Using Azure DevOps Pipelines to inject configurations for ASP.NET Core Aeb App on linux
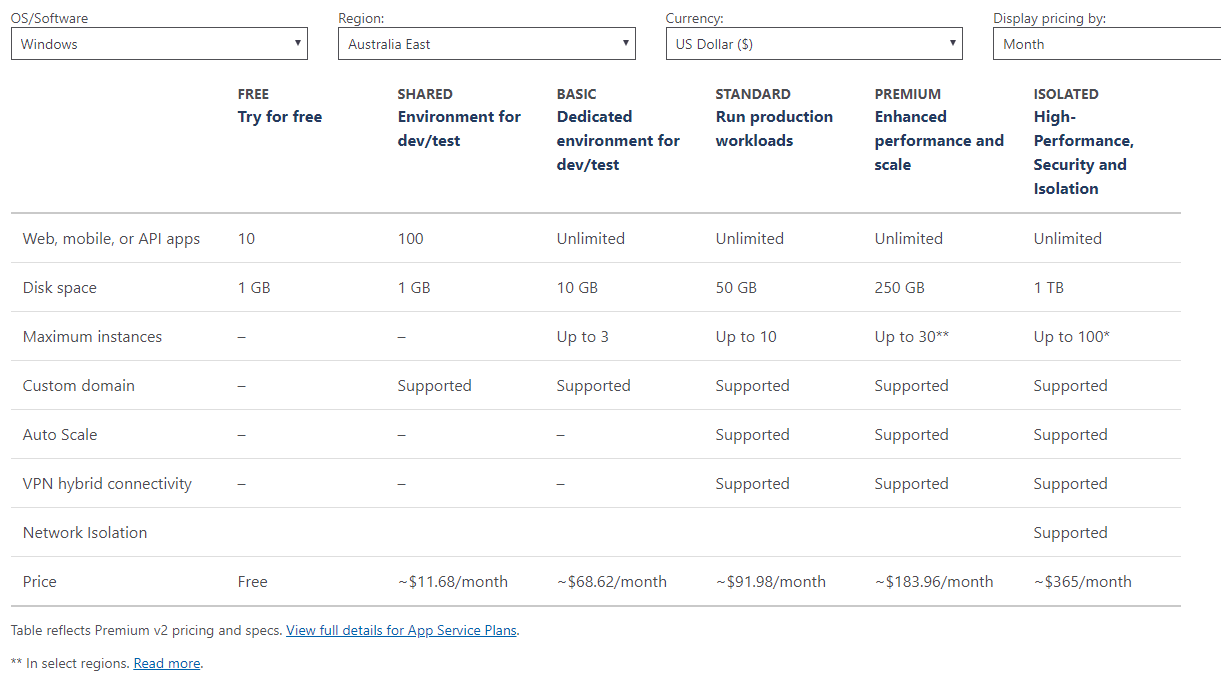
ASP.NET Core is a cross-platform, high-performance framework for building cloud-based applications. One benefit is we can run ASP.NET Core apps on Linux, and it is easy to deploy as Docker images. One more thing, the price is good. Let us compare the price tiers of Azure App Service:
Web App on Windows:
Web App on Linux:
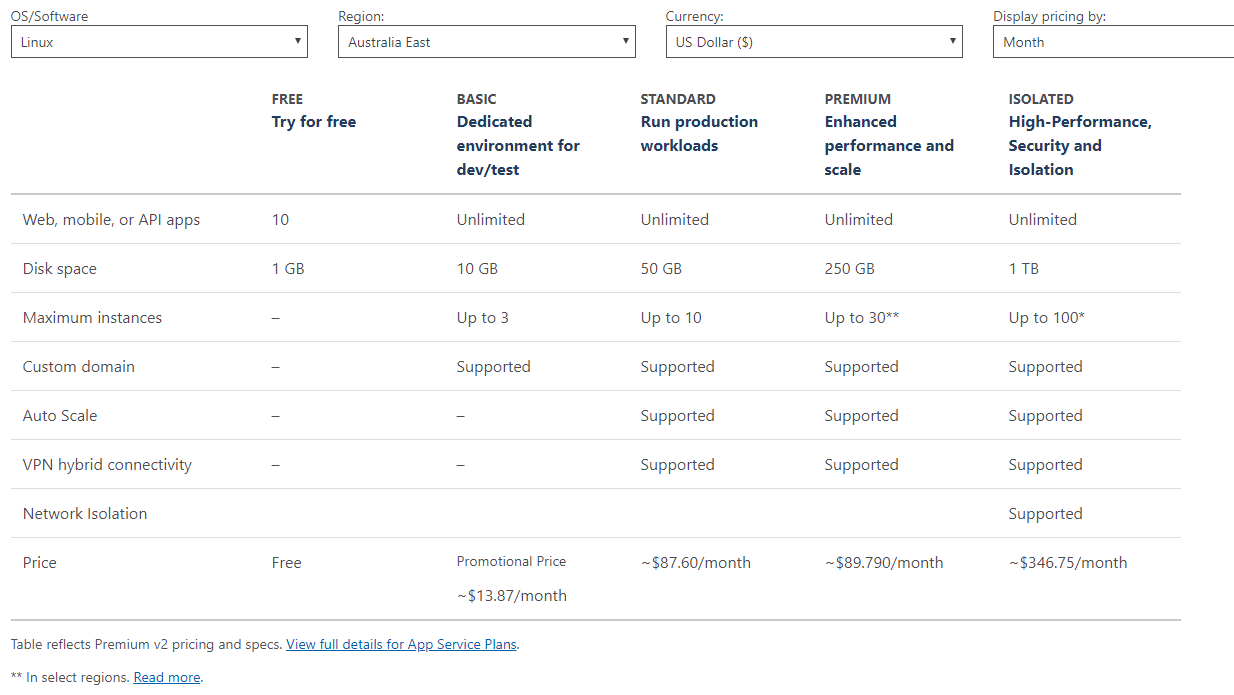
Obviously, the Linux host is more economic. So it is time to move to Linux! When we deploy the project, I would say Azure DevOps is a good choice - it is free for open source projects, and it simplifies the setup of an entire CI/CD pipeline for all platforms. You can quickly deploy the application to various targets: such as App Services, Containers, or K8S, etc.
There are a bunch of articles to describe how to use the Azure DevOps Pipelines to deploy ASP.NET Core apps to Azure App Service. In this article, I will more focus on how to deploy to Web Apps on Linux and Web App for Containers, and how to inject the configurations in the release pipeline. If you do not know much about Docker, no worries. I will explain fundamentals regarding Docker.
Prerequisites
First, we need to prepare an ASP.NET Core Web App. If you have .NET Core CLI installed, you can create a new ASP.NET Core Web App by using the below command:
1 | dotnet new mvc -n DevOpsSample.WebApp |
It will create a new MVC project. Then you need to create a GitHub repo and push your new project to GitHub. Or you can just fork my repo from GitHub: https://github.com/yanxiaodi/DevOpsSample. It is a default .NET Core 3.1 MVC project. Let us use it as our example.
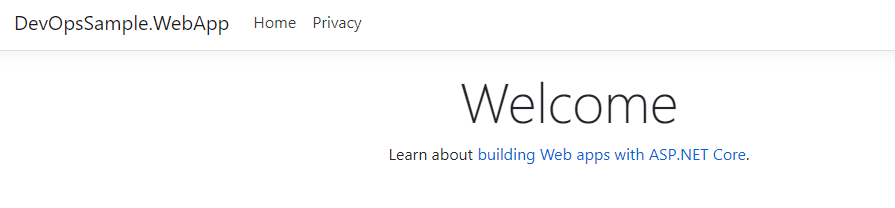
If you run the project, you will see the default page:
You also need a valid Azure DevOps account. If you do not have one, please sign up for free here.
Let’s get started!
Set up the appsettings.json
ASP.NET Core uses multiple ways to store configurations. One of the most common ways is using the appsettings.json file. A typical appsettings.json file looks like this:
1 | { |
Usually, it can be used to store the database connection strings. But for simplicity, we do not need database so I added a couple of key-value pairs, which have a hierarchical structure. For more detail: Configuration of ASP.NET Core.
We can use the built-in IConfiguration interface to read the values and show them on the page. Open the HomeController.cs file in the Controllers folder and add a private field:
1 | private readonly IConfiguration _configuration; |
You need to add using Microsoft.Extensions.Configuration; on the top of the code to import the namespace. Then update the constructor to inject the IConfiguration:
1 | public HomeController(ILogger<HomeController> logger, |
Update the Index action to read the configurations:
1 | public IActionResult Index() |
Then update the Index.cshtml file in the Views/Home folder:
1 | <div class="text-center"> |
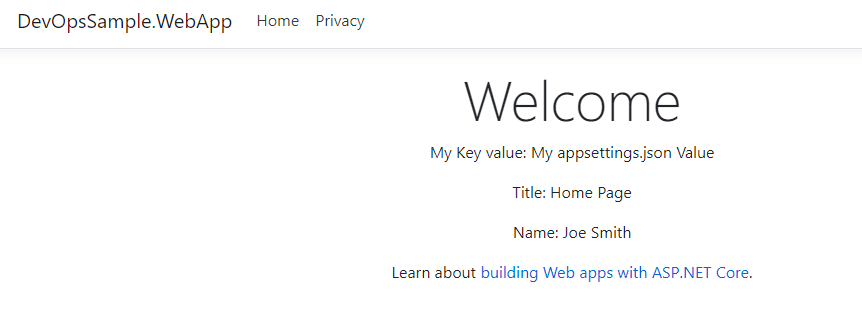
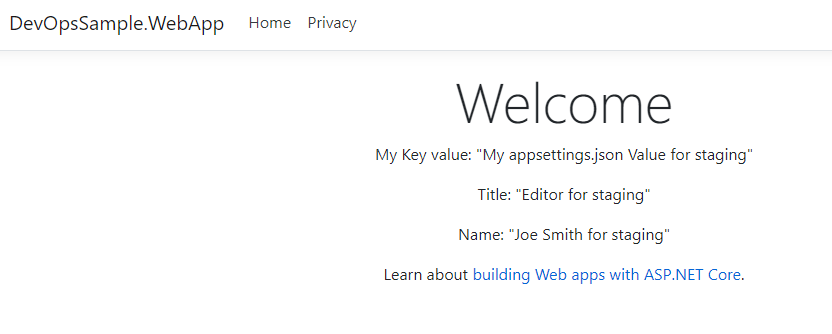
Now run the app again. We can see the correct values on the page:
In the development stage, we can use the appsettings.Environment.json to store the values for development, such as appsettings.Development.json. Or use app secrets: Safe storage of app secrets in development in ASP.NET Core. When we release the app, the temporary values will be replaced by correct values in the pipeline.
Creating the first CI pipeline
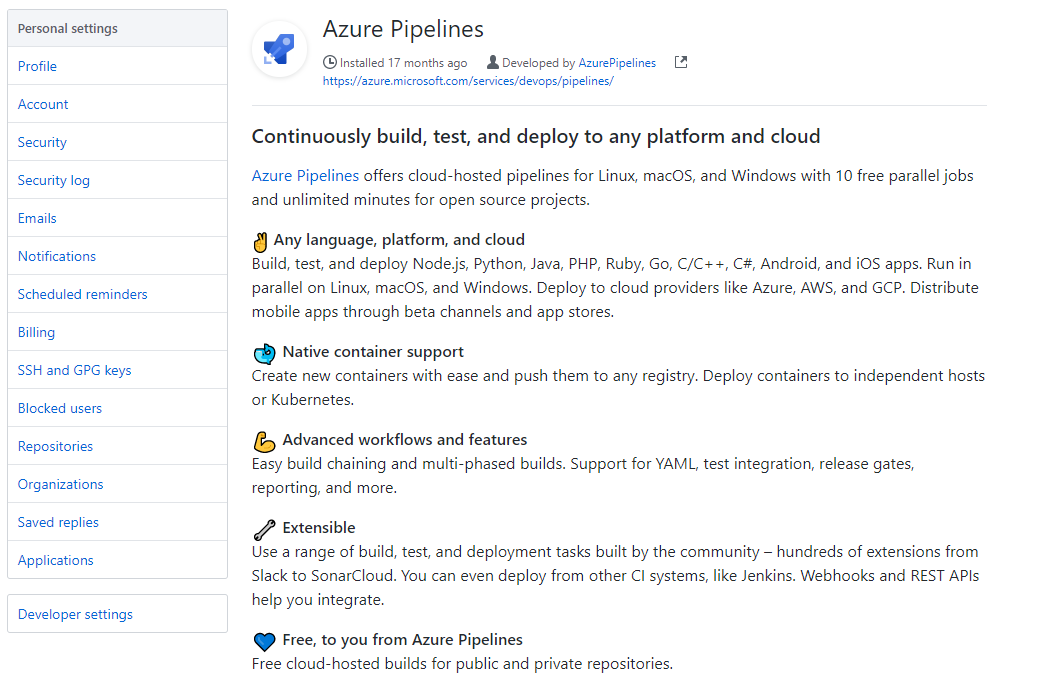
The first pipeline is to make sure the code change will not break the build. Let us build a pipeline. If your code is hosted on GitHub, you can install Azure Pipelines from the marketplace for your project:
I have written an article to describe this process. You can find it here: Using Azure Pipelines to publish the NuGet package from GitHub repo.
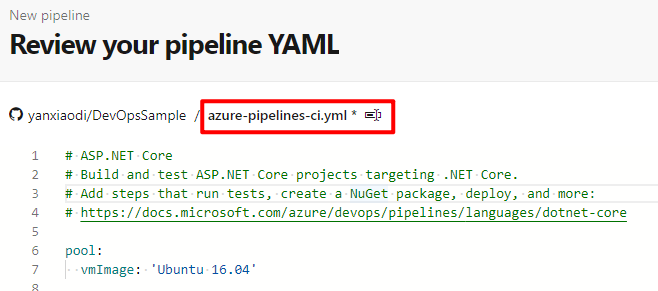
Once it is set up, you can find the project in Azure DevOps. Then click Pipelines in the Pipelines menu and click New pipeline button. You will be asked to select the code repo. Choose the correct repo. Next step is to select the project. In the third step, Azure DevOps will automatically analyze the code and generate a basic pipeline YAML file. For our ASP.NET Core project, the basic YAML file looks like this:
1 | # ASP.NET Core |
The first pipeline is quite simple. It runs dotnet build command to build the project. We can rename it to azure-pipelines-ci.yml:
It specifies the build pool as Ubuntu 16.04, which is hosted by Microsoft. You can find all the supported Microsoft-hosted agents here: Microsoft-hosted agents. I change it to ubuntu-latest so it can use the latest ubuntu version.
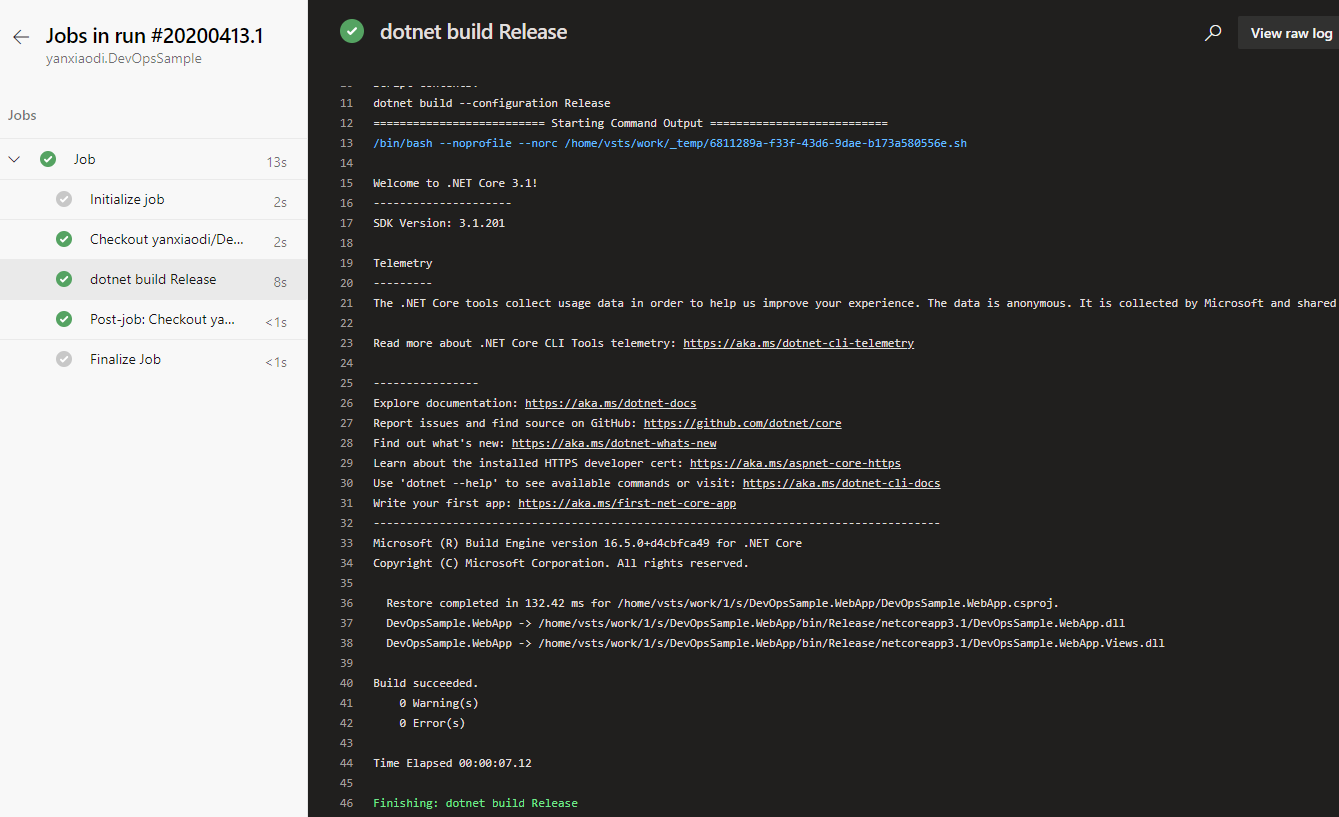
Then we can click Save and Run and see the output:
The build is succeeded. If you need to start the build pipeline when you push PR or the PR is merged, you can edit the pipeline and set up the triggers:
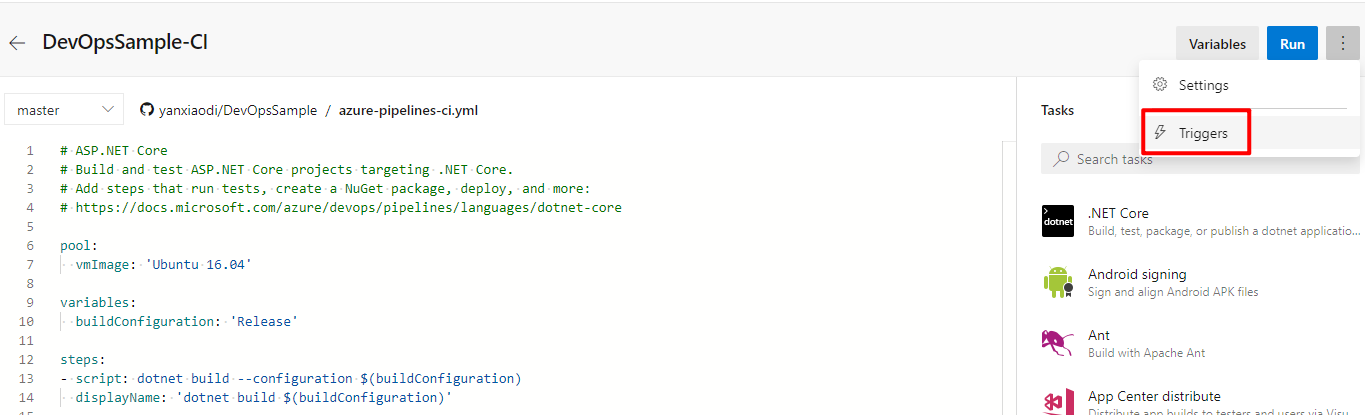
Enable Continuous integration and Pull request validation:
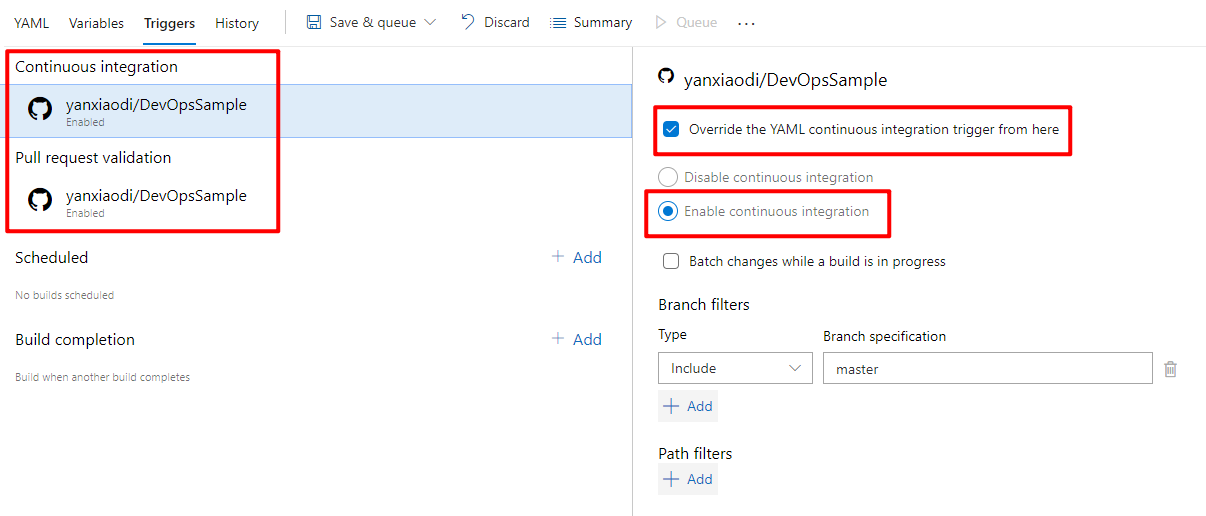
The trigger configured here will override the trigger in the YAML file. However, it is up to you regarding which trigger will be applied. You can also config the branch filters and path filters here. So every time we push code to the specified branch, it will trigger this pipeline to validate the build.
Publishing the app to Azure Web Apps on Linux
Next, we need to deploy the app to Azure Web Apps on Linux. Before we create the release pipeline, we need to create a new Web App on Linux from Azure Portal. You can also use Azure CLI to create it.
It is quite straightforward to create a new Web App in Azure Portal:
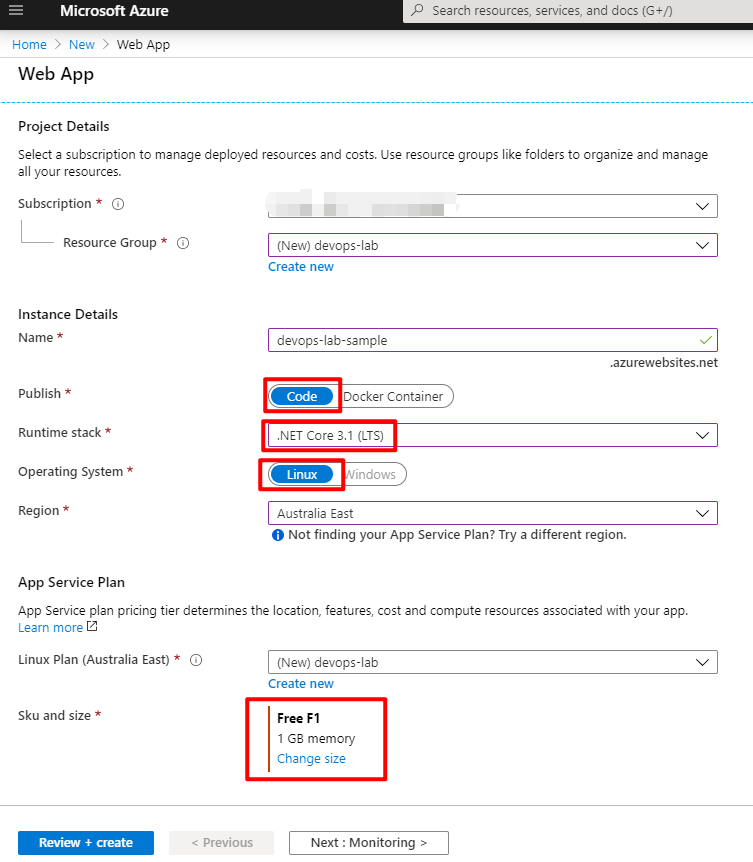
We will select Linux as the Operating System and Code as Publish type. For the demo, you can select the free F1 tier. It provides 60 minutes free compute time each day. Then click Review + Create to create the resource. You will see it after a couple of minutes in the portal.
Creating the Web Apps on Linux
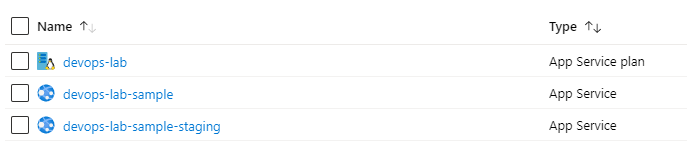
Deployment slots is very useful when we have multiple stages, eg. development, stage, production, etc. We can validate the new version of the app in a staging deployment slot before swapping it to the production slot. However, the free F1 tier does not support it. So we could create another free web app as the staging environment. If you scale up the App Service plan to Standard or higher, feel free to enable this feature. You can find more detail here: Set up staging environments in Azure App Service. For this demo, I will create another web app instance as the staging environment. I recommend you create these two Web Apps in one resource group so it would be easy to delete them all after this exercise.
Note:
Keep in mind that F1 tier only has 60 minutes each day.
Here are my resources in devops-lab resource group:
Creating the artifact pipeline
Next, we need to build the artifact for the release. My goal is to replace some values in the appsettings.json file. Let’s create a new build pipeline from Azure DevOps.
You can find Show assistant button on the top right corner:
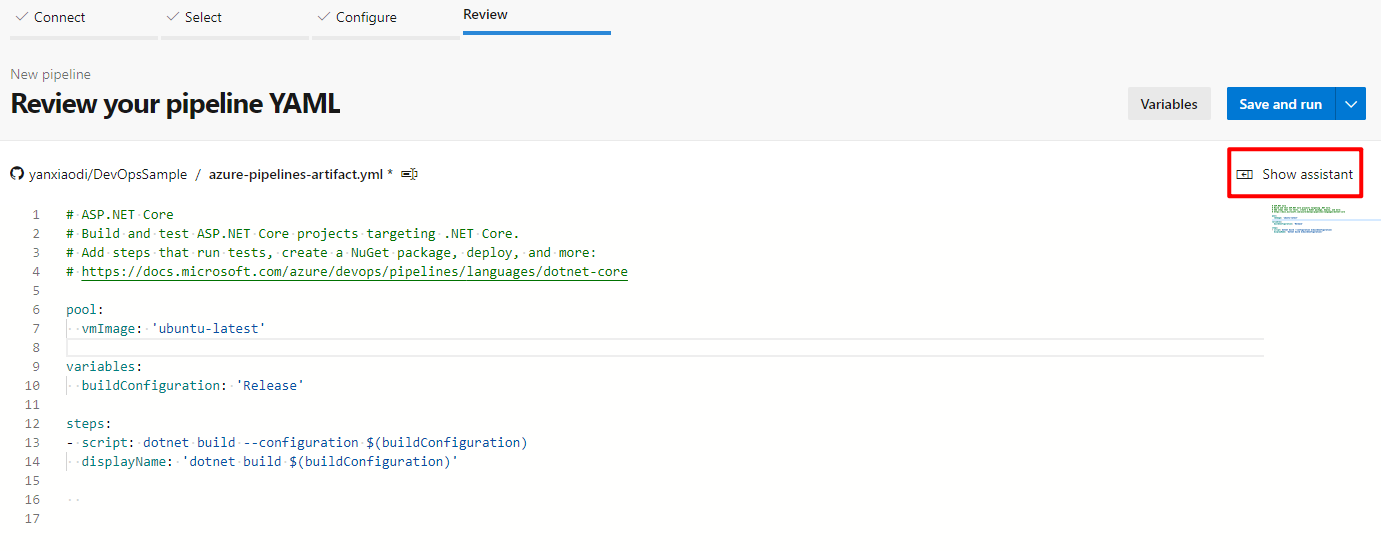
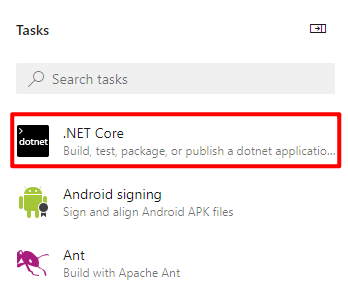
Click Show assistant then select .NET Core:
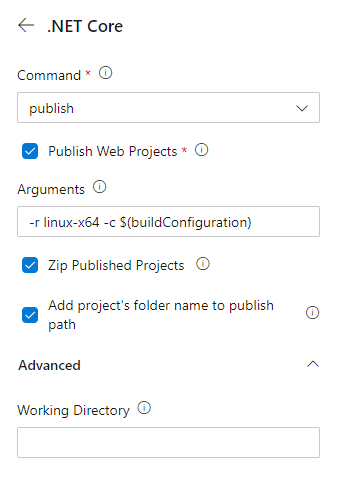
We need to add a publish task that publishes the application and its dependencies to a folder for deployment. Find more detail about this command here: dotnet publish.
The configuration is shown below:
Click Add, you will see the new script section is added to the current YAML file:
1 | - task: DotNetCoreCLI@2 |
In this task:
- We specify the runtime as
linux-x64. - The configuration argument
-ccomes from the predefined variable$(buildConfiguration)in the top of the YAML file. The value isRelease. - The output
-oargument is$(Build.ArtifactStagingDirectory), which is a predefined variable of Azure DevOps. You can find all the available predefined variables here: Use predefined variables. So when the publish command completes, it will output the app to this folder for the next step.
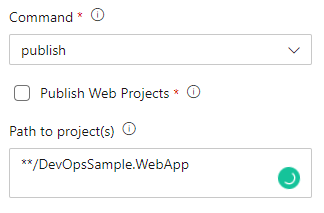
If Publish Web Projects is checked, the task will try to find the web projects in the repository and run the publish command on them. Web projects are identified by the presence of either a web.config file or wwwroot folder in the directory. If your solution contains multiple web projects but you only want to build one specific web project, you can uncheck this option and explicitly assign the project path:
Or, you can define a variable regarding the project path and use it like this:
1 | pool: |
The Zip Published Projects means the folder of the application will be zipped by the publish command. It is true by default. If you do not need it, you can add zipAfterPublish: false at the end of the inputs elements.
If you click the Settings link on each task, you can reopen the UI to config the task:
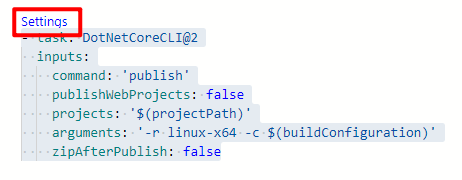
This feature is very useful if you are not familiar with YAML syntax.
For some reason, you may see the build fails and show the below error:
error MSB4025: The project file could not be loaded. Data at the root level is invalid. Line 1, position 1.
Because the project is based on .NET Core 3.1, we need to install .NET Core SDK in case there is no corresponding SDK installed on the agent.
Add a new task before the publish task:
1 | - task: UseDotNet@2 |
Now we have already published the artifact to the Build.ArtifactStagingDirectory folder. We need to publish the artifact. Search publish in the assistant:
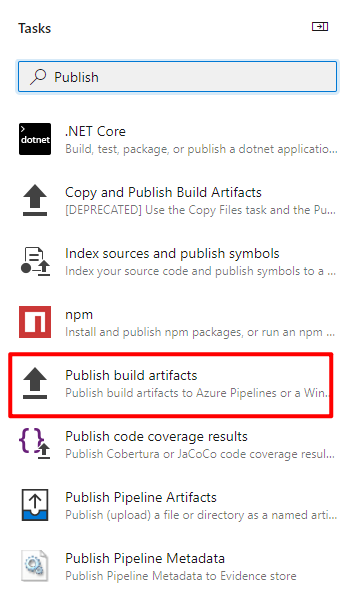
Select Publish build artifacts:
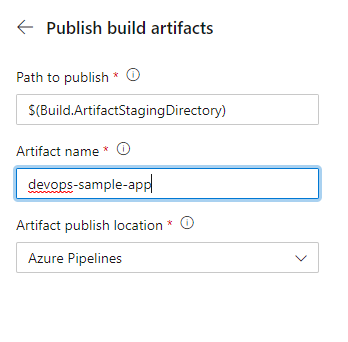
The default Artifact name is drop. You can give it a more sensible name if you like.
The final artifact pipeline is shown below:
1 | pool: |
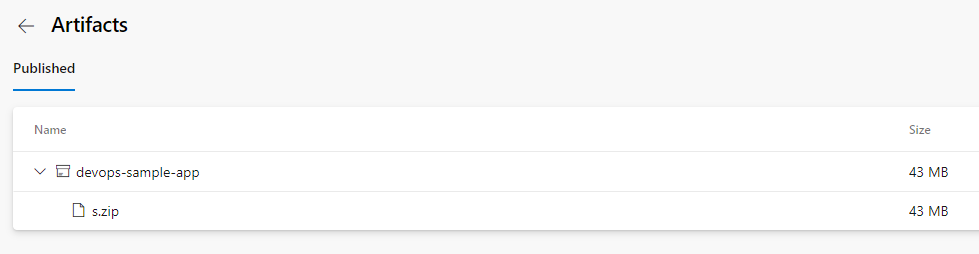
After you run this artifact pipeline, you will find the artifact on the build summary page:

Creating the release pipeline
Now the artifact is ready. But you may realize that how we would update the configurations in appsettings.json? We can inject the values in the release pipeline for multiple environments. Let’s move on.
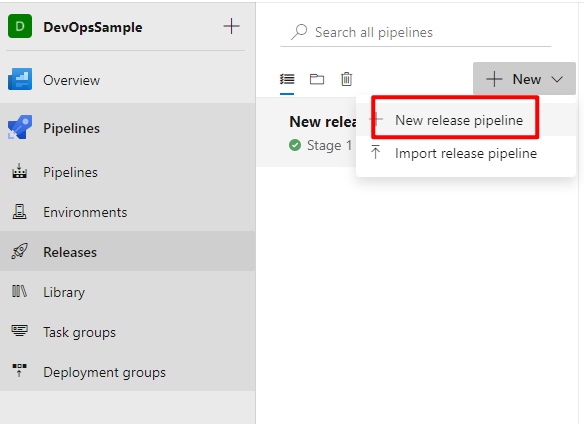
Click Releases in the Pipelines menu. Click New to create a new release pipeline:
On the next page you will be asked to select a template:
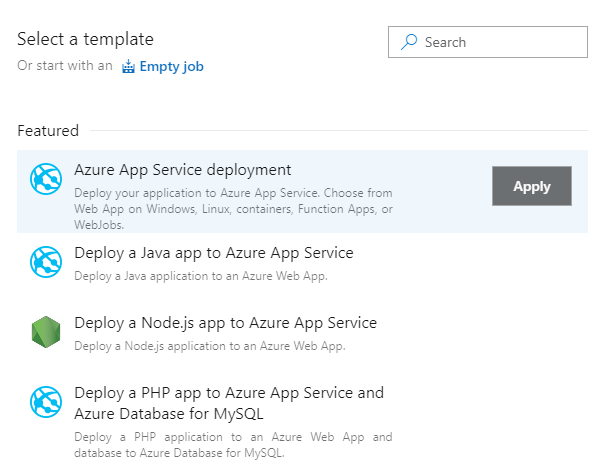
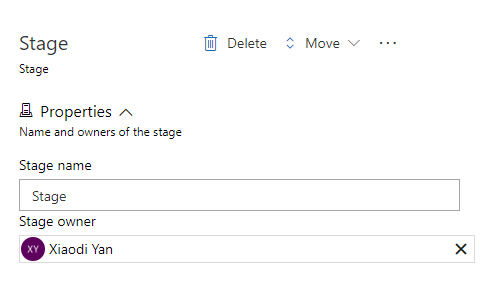
For our demo, we select Azure App Service deployment. Then change the name to Stage.
Next we need to add an artifact. Click Add an artifact:
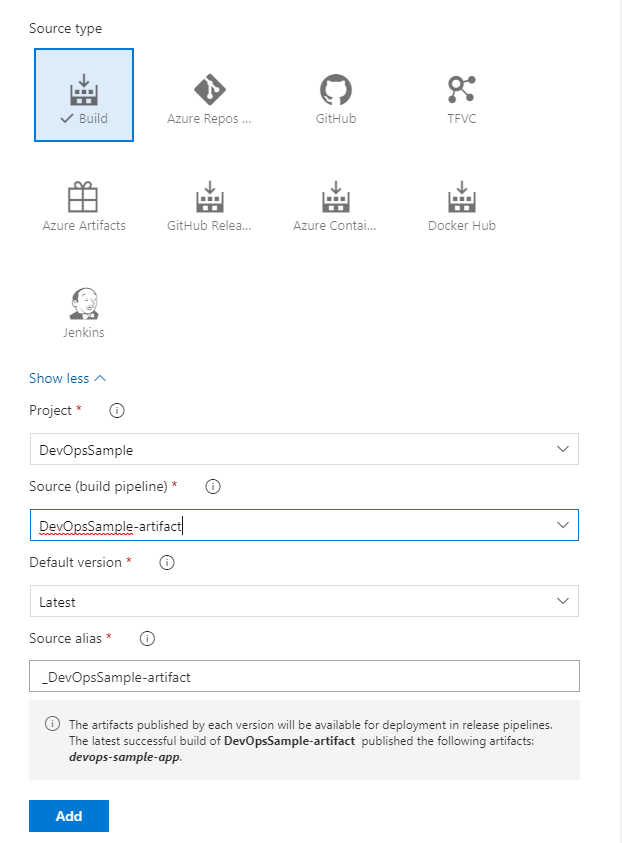
There are quite a few source types we can use. For this demo, we select Build. Then specify the build pipeline to the one we created in the previous section. The default version is Latest. So every time we create a new release, it will pick up the latest build to publish.
You can click the lightning icon to config the CD trigger:
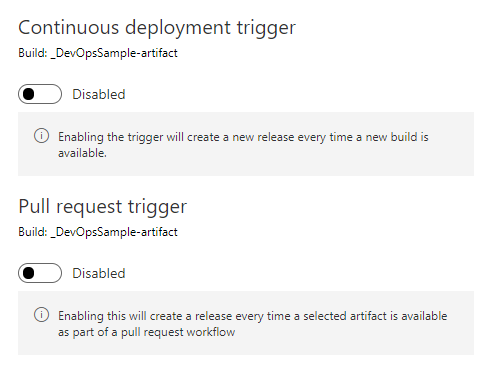
For this demo, it is not necessary because we will manually trigger the release.
Click the job in the Stage and config the task as shown below:
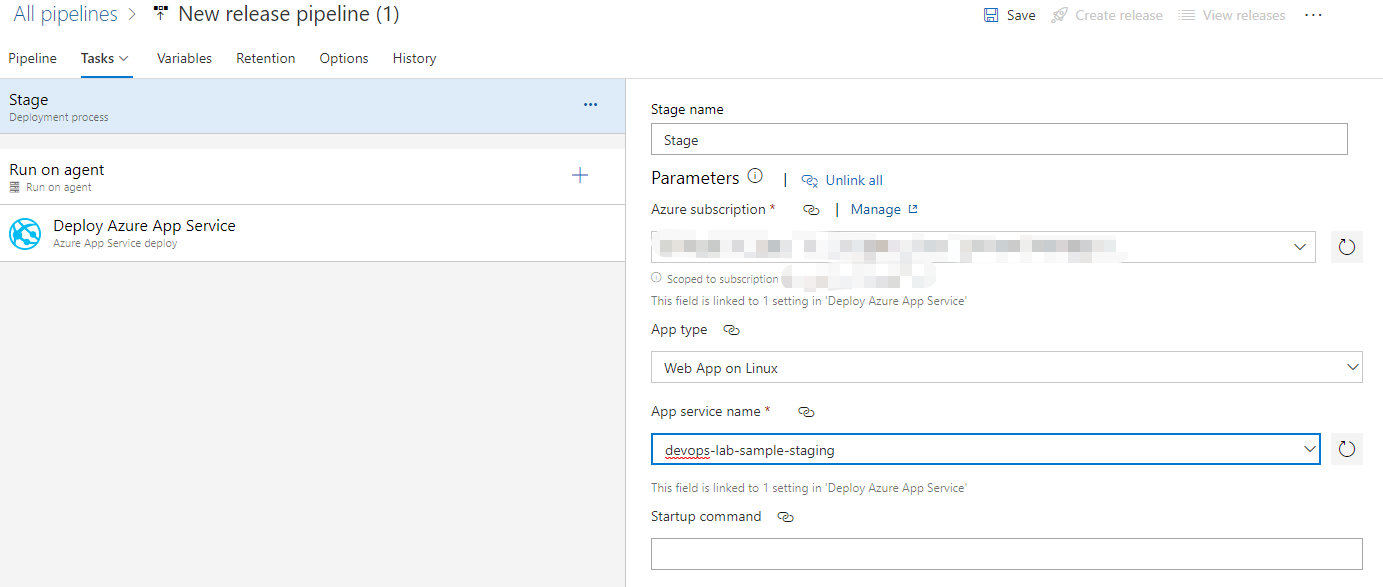
You need to authorize your account when selecting the Azure subscription. For App type, please select Web App on Linux so that you can see the Web Apps you created a moment ago.
Then click Run on agent:
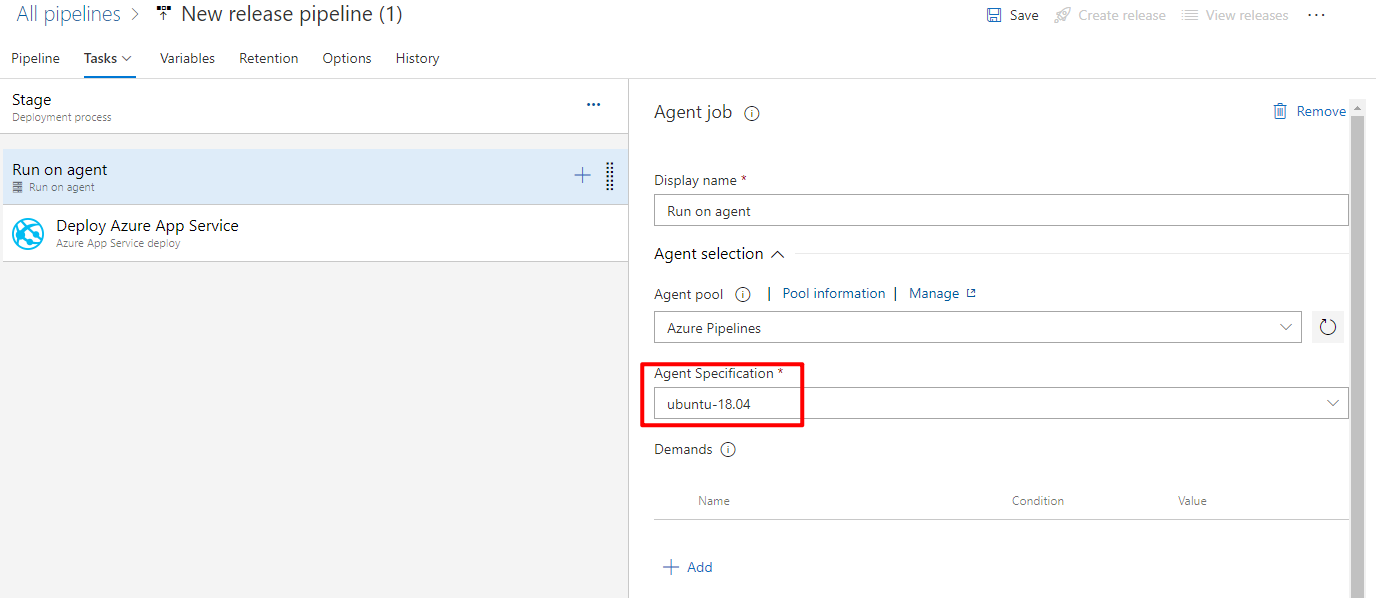
I use ubuntu-18.04 as the Agent. Actually it does not matter because ASP.NET Core is cross-platform. You can use other agents as well.
Next click Deploy Azure App Service so we can config some other options:
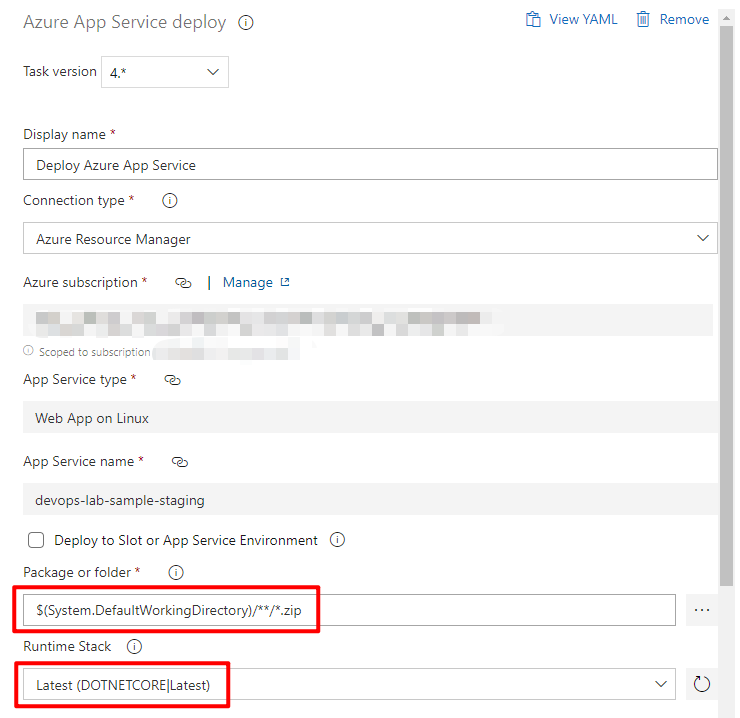
Keep in mind that if you disabled the zipAfterPublish feature in the artifact build pipeline, you need to change the Package or folder in this step.
Do not forget to select the correct Runtime Stack. For our ASP.NET Core 3.1 application, you can select Latest.
If you are using the Standard or higher tier, you can use the deployment slot here:

You can click View YAML to see the generated YAML file:
1 | steps: |
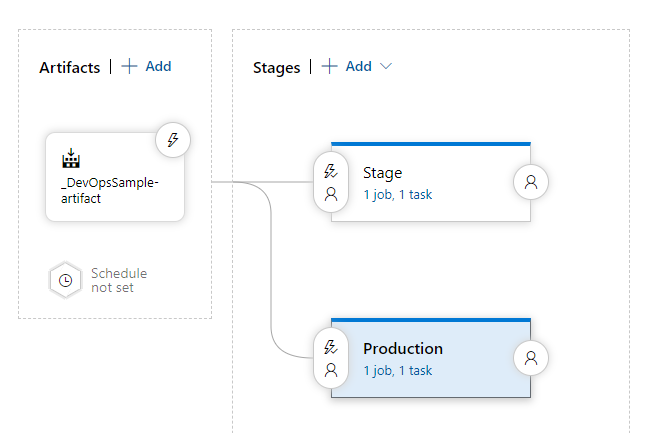
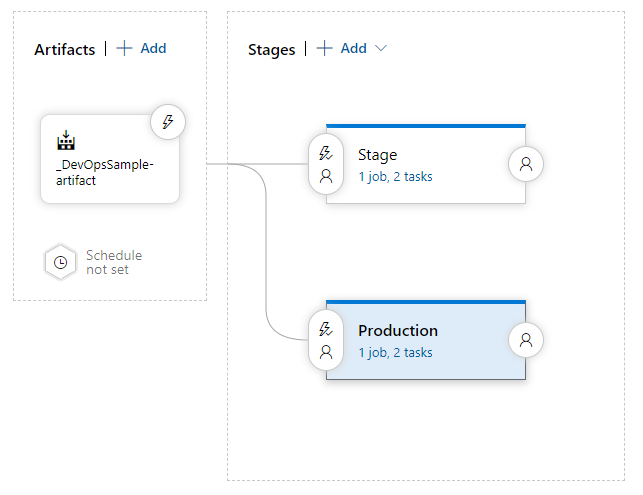
We can add another stage for production. Click Add on the edit release page:
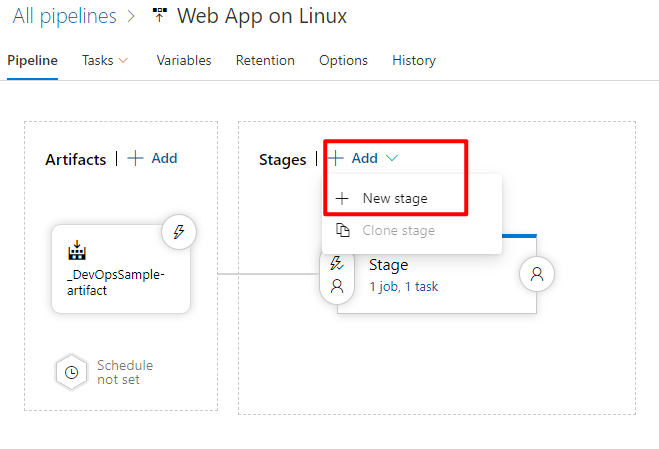
For the production stage, just select another Web App instance or select the correct deployment slot if you enabled this feature. So now we have two environments for staging and production:
Injecting the values for appsettings.json
For now, we only have one artifact. That means the configurations (eg. the database connection string) in the appsettings.json are the same. The next step is to replace the values in appsettings.json file.
We can use Library to create variables for different environments. Click Library in the Pipelines menu, and click + Variable group:
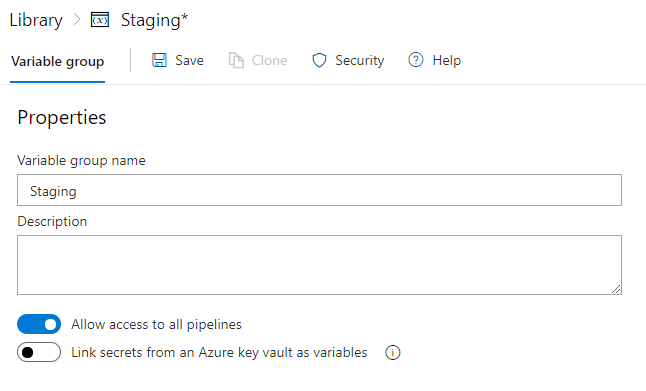
Update the group name to indicate which environment it is for. Then add variables based on the below rules:
- If the key is non-nested, like MyKey in our demo, use the same name as the key, eg.
MyKey. - If the key is nested, like Title in Position, use JSONPath expressions to specify them, eg.
Position.Title. - If there are spaces in the value, use quotation marks to wrap the value, eg
"My appsettings.json Value".
So the variable group would be:
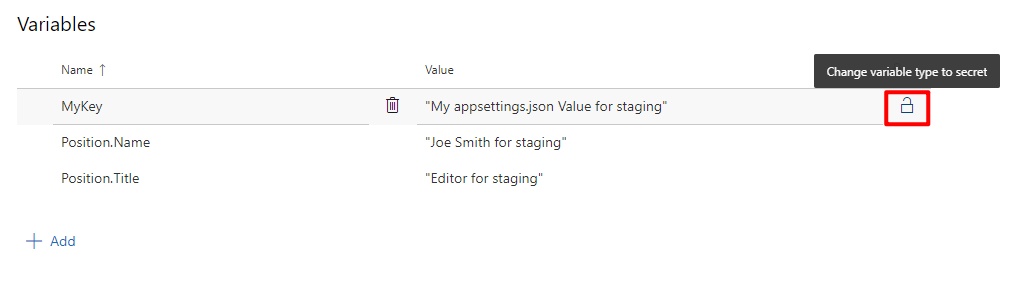
IMPORTANT:
If you store the database connection strings here, please make sure you click the lock icon to change it to secret. Otherwise, the value will show in the release logs.
Now return to the release pipeline edit page and edit the tasks for one stage. Click the plus button on the right side of Run on agent then search transform:
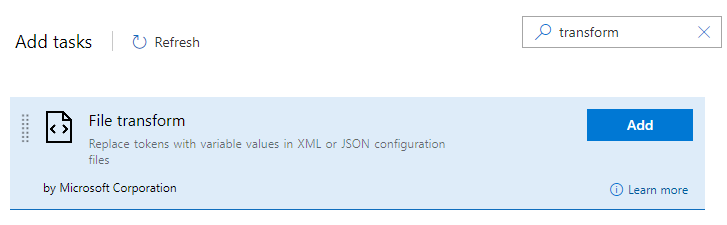
Add the File transform task to the pipeline. Make sure it is before the deploy task. The configuration is shown below:
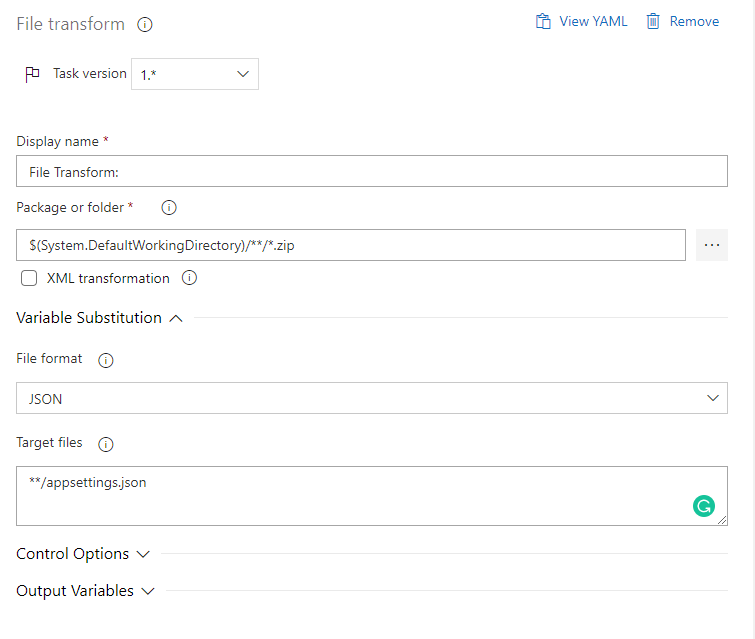
File transform is a task to apply file transformations and variable substitutions on configuration and parameters files. For more detail: File transforms and variable substitution reference.
Change the Package or folder based on your configuration in the artifact build pipeline. Select JSON as the File format. The Target files is **/appsettings.json. This task will replace the corresponding key-value pairs according to the variable definitions. Next we need to link the variable group.
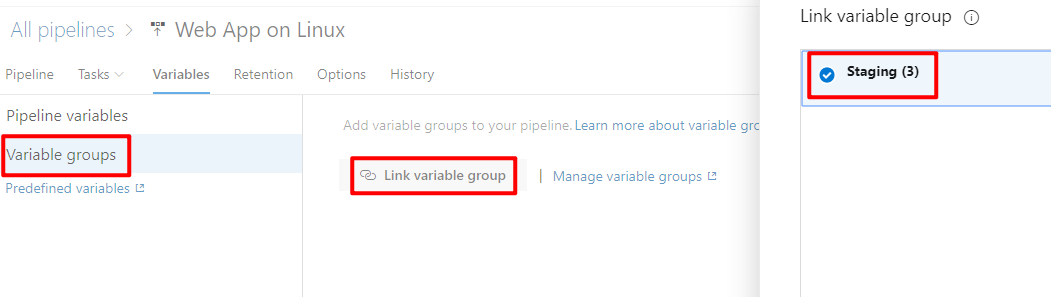
Click Variables tab and link the variable group:
Save the pipeline. Create another variable group and add the File transform task for another environment. You can easily Clone the variable group and update the values.
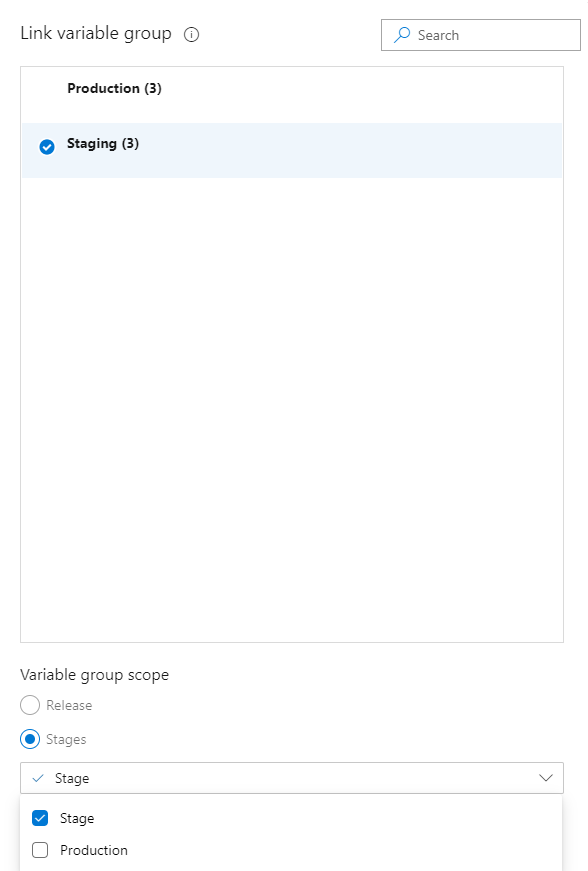
Because these two variable groups have the same keys, so we need to specify the variable group scope. In other words, the Staging variable group is only for Stage, and the Production variable group is only for Production:
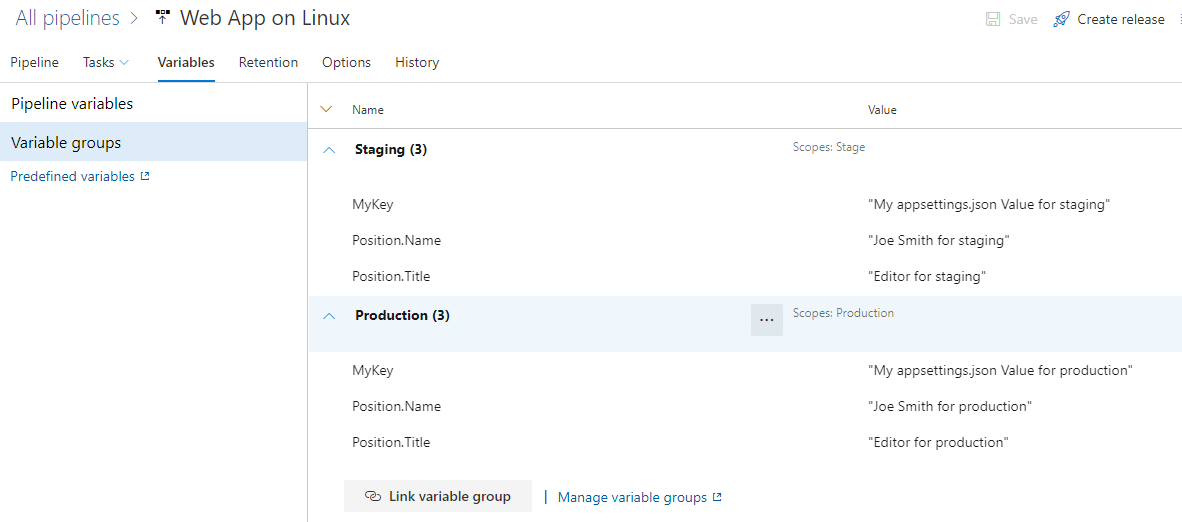
The final configuration for the variables is as below:
Now all tasks are ready to go:
Deployment
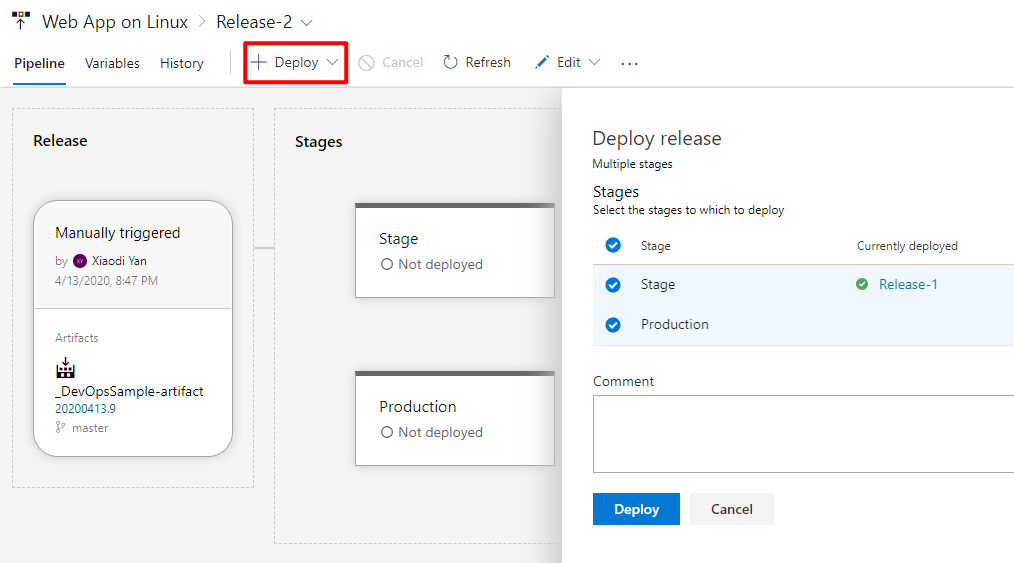
Click Create release on the release detail page, you can select which stage you need to deploy:
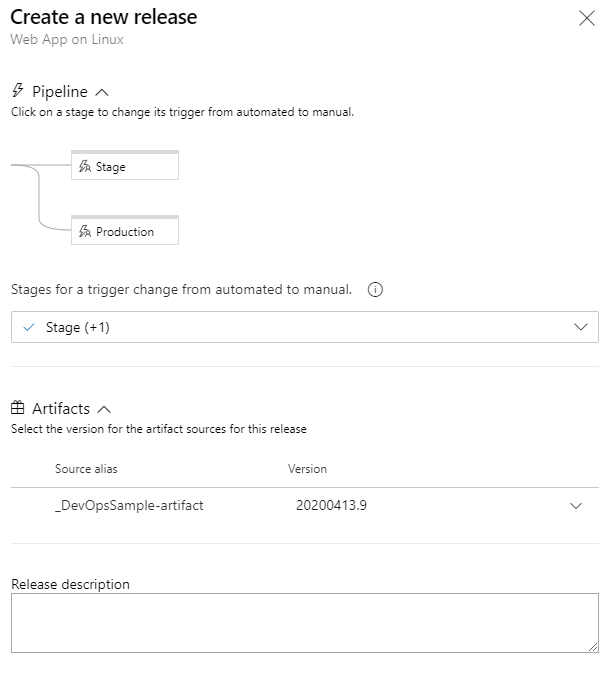
It automatically selects the latest build version as the artifact. Once you click Create, you can see a toast message:
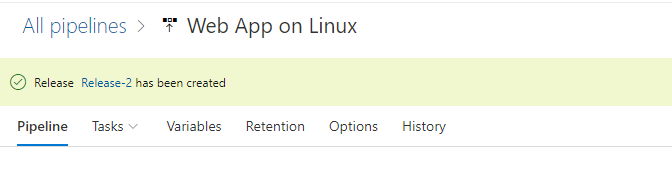
Click the link to check the release status:
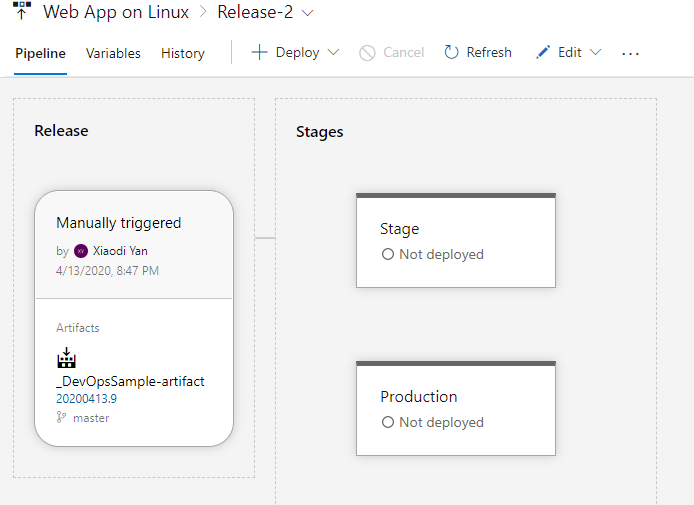
You can deploy to one or multiple stages:
The pipeline will download the artifact from the specified folder and upload it to Azure App Service. It also replaces the correct variables for different environments.
Checking the results
If you stopped the App Service instances, please start them in Azure Portal.
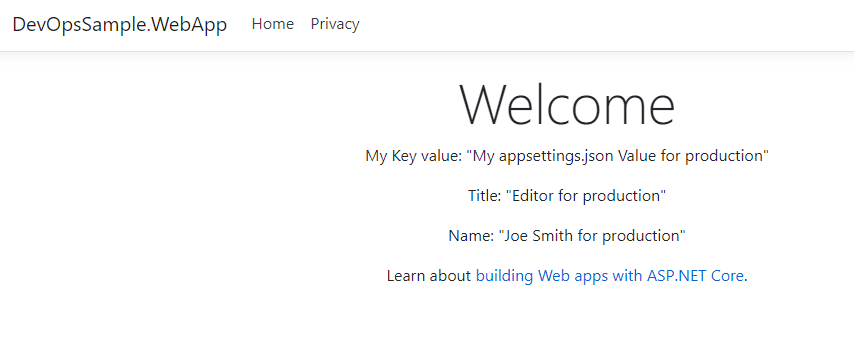
We can see the correct configurations have been replaced:
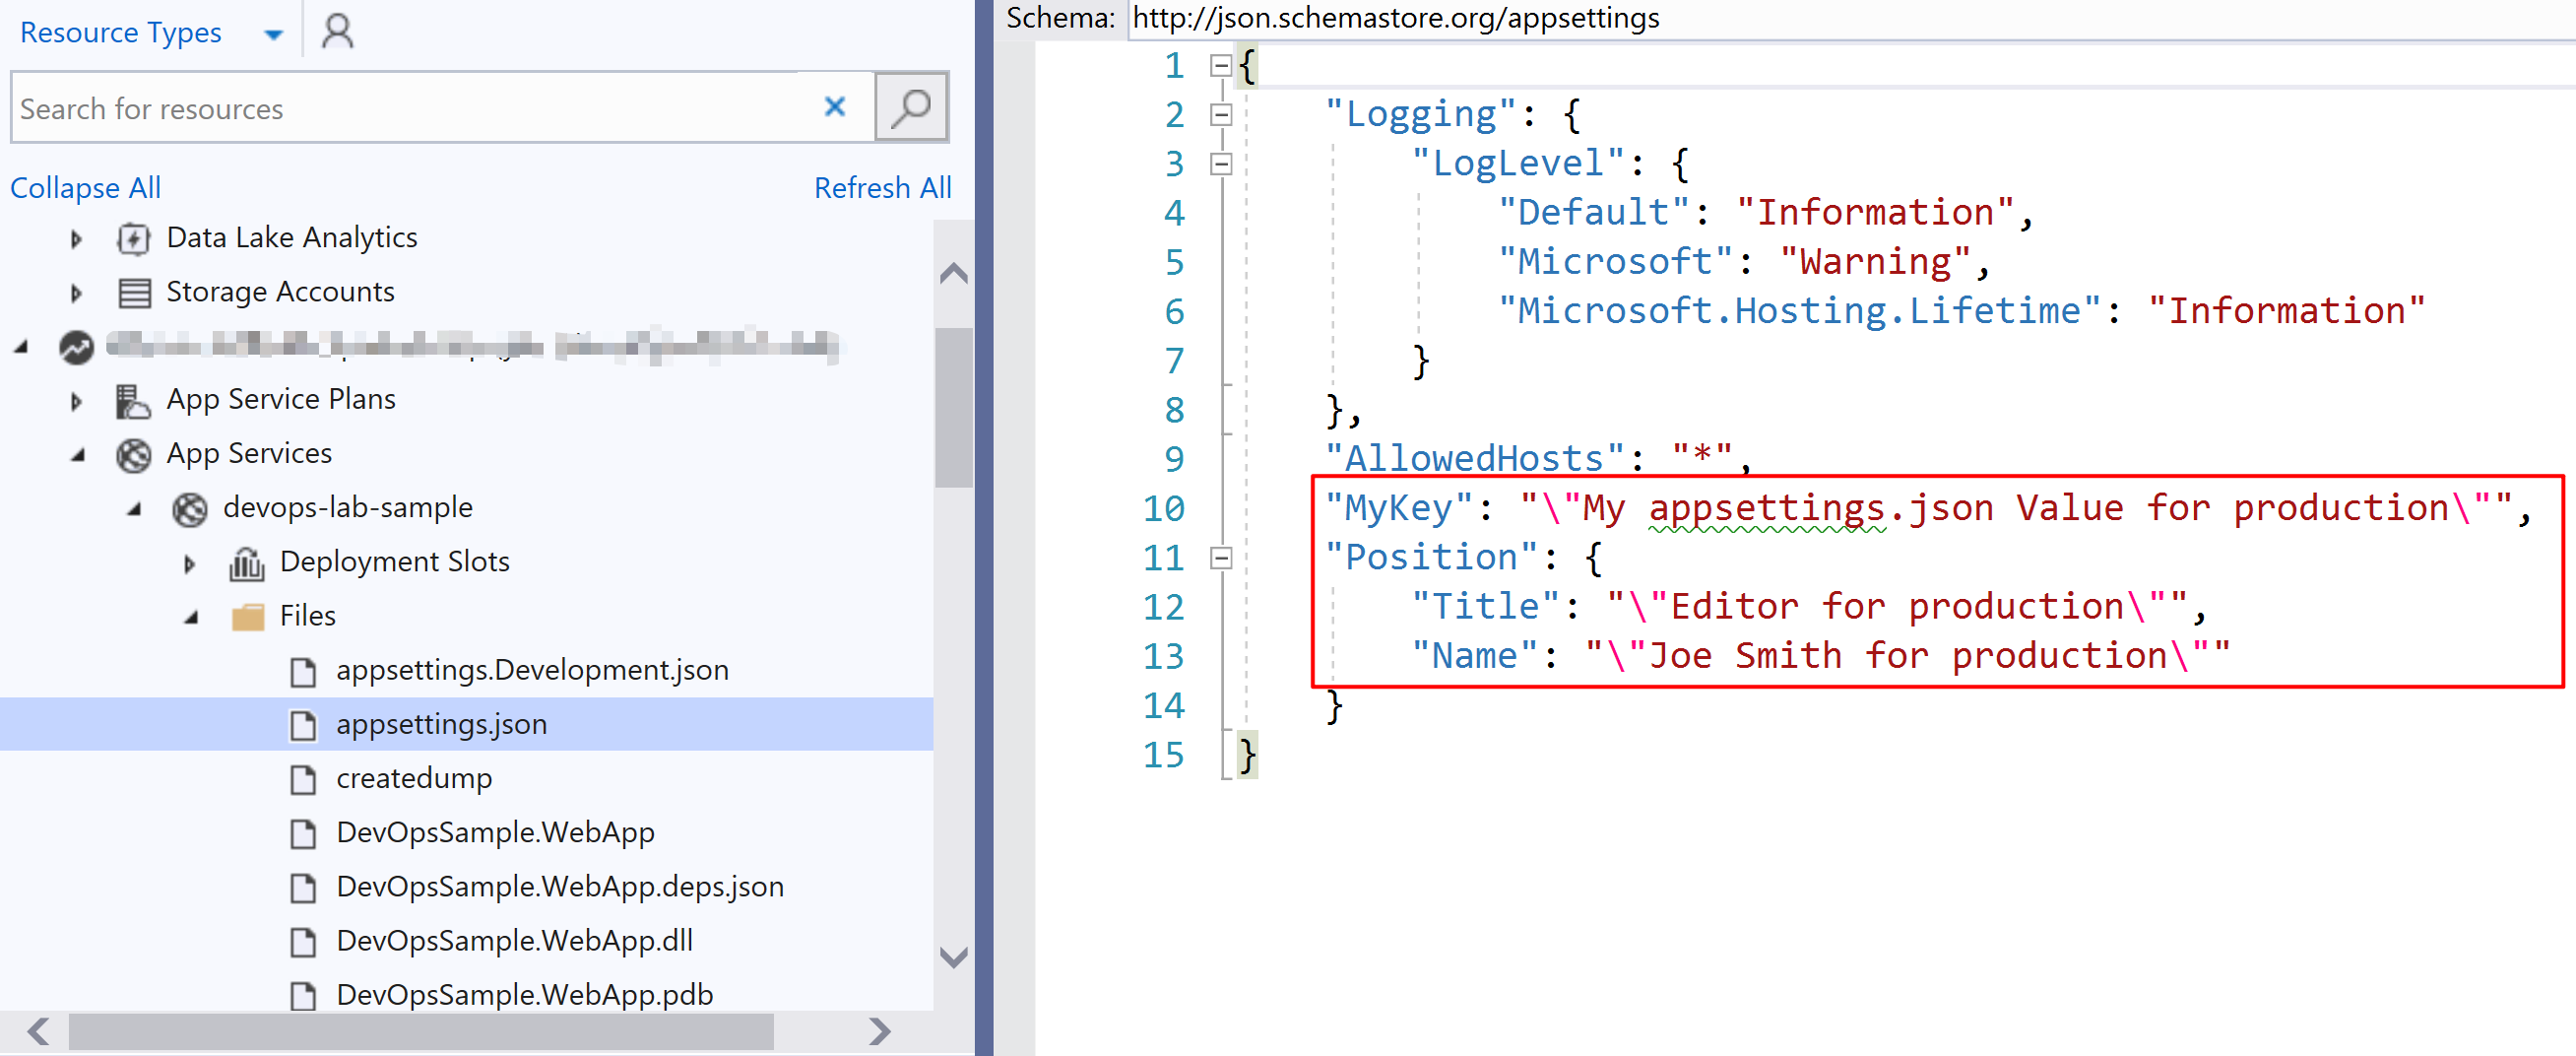
We can check the file content by Visual Studio 2019. Click View - Cloud Explorer then connect to your Azure subscription. You will find the actual file content:
Summary
In this part, we use Azure DevOps Pipelines to build and deploy the ASP.NET Core Web App to Azure Web App on Linux. The key is how to inject the appsettings.json in the deployment. We use File transform task to do it.
In part 2, I will show you how to create Azure Container Registry and deploy the same Web App to Azure Web App for Containers. Please stay tuned.
Part 2: Using Azure Devops Pipelines to inject configurations for Asp.Net Core Web App for Containers