Increase The Version Number In Azure DevOps
Azure DevOps Pipelines is one of my favorite components in Azure DevOps. In this article, I will show you how to customize the version number in the YAML file for .NET applications. Why? Because I have seen some developers set up the build version number as a parameter in Azure DevOps UI, so they have to update the parameter whenever they need to build a new version. The better way is to manage the version number as code, so the pipeline will read the configuration from the code then automatically update it. I’ll show you how to make it in .NET 6 applications. First, let’s look at what the semantic versioning is.
What is Semantic Versioning
Semantic Versioning is widely used to indicate the version numbers of the software. You can find it here: https://semver.org/.
Based on the Semantic Versioning, a version number contains these parts:
- MAJOR version when you make incompatible API changes,
- MINOR version when you add functionality in a backwards compatible manner, and
- PATCH version when you make backwards compatible bug fixes.
So a normal version number may look like this: 1.2.3. It can also contain additional labels for pre-release build, such as 1.2.3-alpha. Moreover, it can contain build metadata. For example, it can contain an additional part which shows the build time (or build number), like 1.0.0+20130313144700.
Semantic Versioning is a specification, not a rule you must follow. Basically, you can define your own format to indicate the versions. In this article, I will specify the major version, the minor version and the patch version manually, and generate another revision version by the Azure DevOps Pipelines. Every time when the pipeline runs, it will increase the revision version. You can easily modify the YAML files to create your own version number format. You can apply the same approach in any kind of .NET Core Web/WPF applications as well. Let’s get started!
Create a .NET 6 Web API project
Create a new project
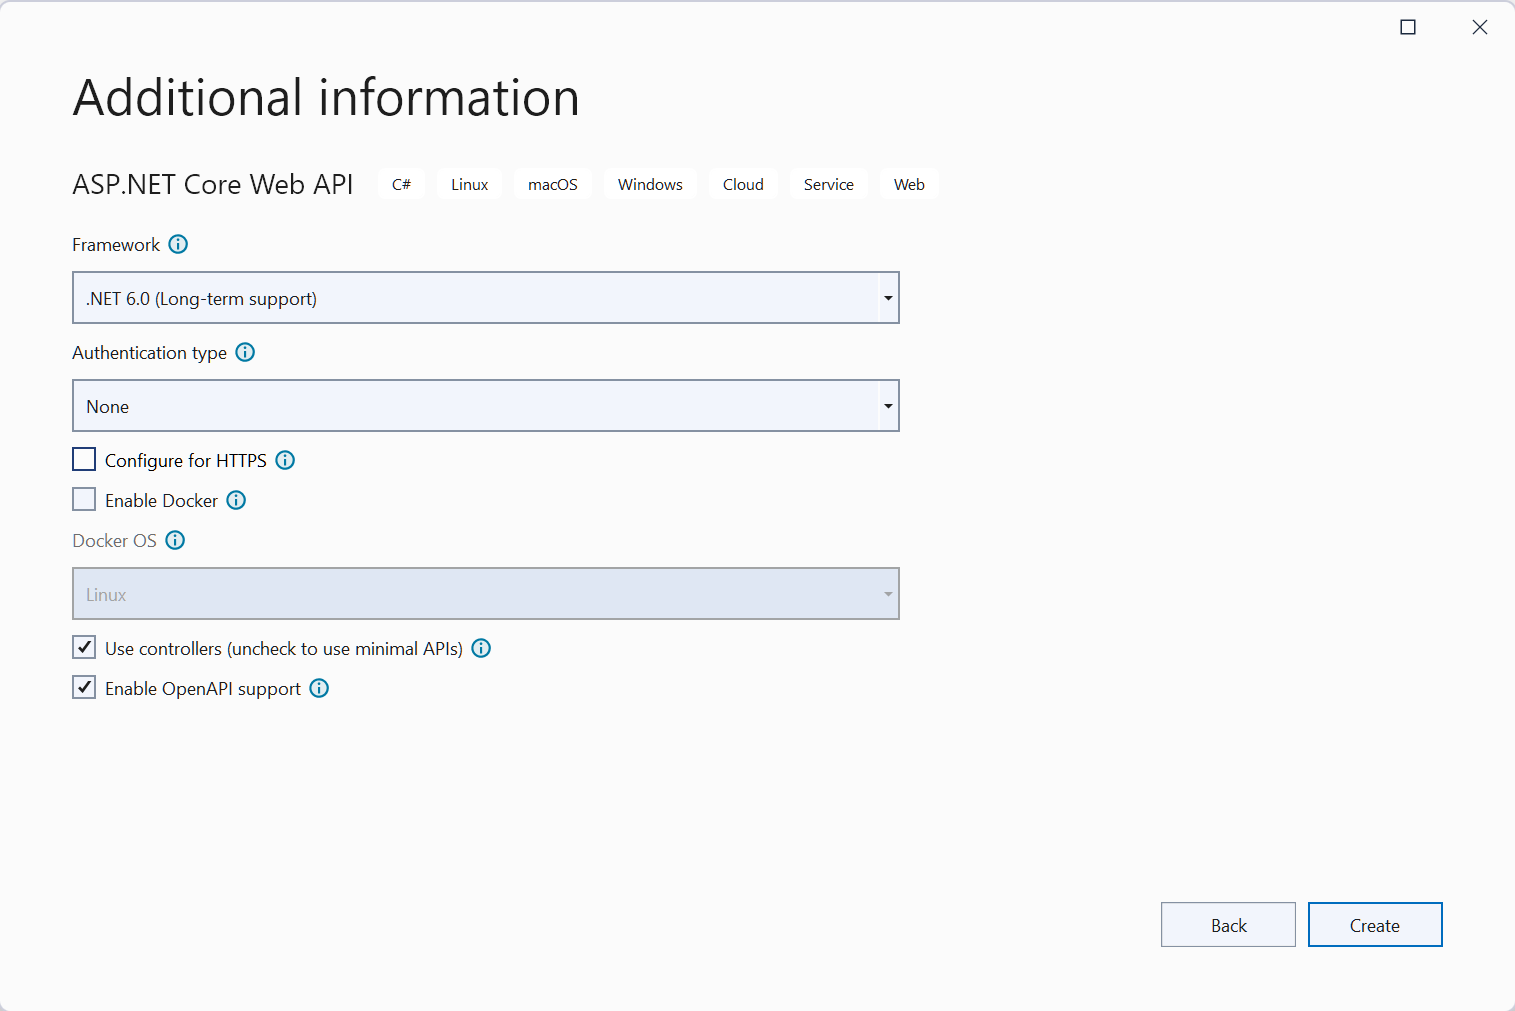
You might know how to create a new .NET 6 Web API project. We just use the default .NET 6 Web API template. Select ASP.NET Core Web API template.
Type the project name and select the location, then click Next.
Click Create, you will have a new .NET 6 Web API project.
Add the model and controller
We will use a model to represent the application information. Create a Models folder and add a new AppInfo class with the following code:
1 | namespace BuildVersionDemo.Models |
Then Add a controller named AppInfoController in the Controllers folder:
1 | namespace BuildVersionDemo.Controllers |
In the above code, we use Assembly.GetEntryAssembly()?.GetName().Version?.ToString() to get the version number of the project. If the field is null, it will return a default version 1.0.0.
Run dotnet run to start the project and navigate to http://localhost:xxxx/api/AppInfo, you will see the output as below:
1 | { "name": "BuildVersionDemo", "version": "1.0.0.0" } |
Ok everything is ready for the next step. Let’s look at how to set up the version number.
Set up the version number with dotnet CLI
dotnet CLI provides the dotnet build command to build the project and its dependencies. It can receive a parameter -p to specify the version of the application, as shown below:
1 | dotnet build -p:Version=1.0.1.1 |
The command will build the project and set the version as 1.0.1.1. Find more information here: dotnet build.
You can run this command in the working folder and you will see dotnet CLI successfully builds the project. Now let’s navigate to the bin/Debug/net6.0 folder, then right-click BuildVersionDemo.dll file and select Properties. In Details tab, you can see the Production version shows 1.0.1.1:

To test it, navigate to the bin/Debug/net6.0 folder, then run the command below:
1 | dotnet BuildVersionDemo.dll |
Navigate to http://localhost:5000/api/AppInfo and you will see the version number has been updated:
1 | { "name": "BuildVersionDemo", "version": "1.0.1.1" } |
When we make the release, we will need to use dotnet publish command. For more information, check dotnet publish. Similarly, we can pass -p parameter as well:
1 | dotnet publish --os win --self-contained true --configuration Release -p:Version=1.0.1.2 |
You can find the release files in bin/Release/net6.0/win-x64/publish folder.
Please note that the --os parameter is available since .NET 6. If you use .NET Core 3.1, you can specify --runtime instead.
So that’s how we set up the version number manually. In the next section, we will check how to build the project in Azure DevOps Pipelines.
Add a project in Azure DevOps Pipelines
You will need to store your project in Azure DevOps Repos or GitHub repos. Once you complete that, you can continue the next step. I have uploaded my code to this GitHub repo so you can fork it or download the files then upload to your repo: https://github.com/yanxiaodi/MyCodeSamples/tree/main/BuildVersionDemo.
Let’s create a new project in Azure DevOps Pipelines. Log in https://dev.azure.com/ then create the New project button:

Create your first build pipeline
Go to Pipelines then create a new pipeline. You will need to select the position of your repo then select the project. I use GitHub repo so it needs authorization:

It may take a couple of minutes. When the authorization is done, you can choose the pipeline template. For our .NET 6 Web API project, we can select ASP.NET template.
Azure DevOps Pipelines will analyze your project and automatically generate a default pipeline for the project. It might vary based on your project. Update the YAML file as below:
1 | trigger: |
We defined the branch which can trigger the build, and the build agent system - you may choose Windows or Linux. If you want to use other build agents, check it here: Microsoft-hosted agents. In the variables section, we have some variables for the project path, buildOS and buildConfiguration. For buildOS field, you may need to build it for other systems, find the code here: Runtime Identifier.
The first task is to install the latest .NET 6 SDK. When I write this article, the Azure DevOps pipelines hosted agents have been updated and now contain .NET 5.x SDK/Runtime along with the older .NET Core version which are currently LTS. But our project is on .NET 6, so we need to install the .NET 6 SDK first. Otherwise you would see an error:
1 | Error NETSDK1045: The current .NET SDK does not support targeting .NET 6.0. Either target .NET 5.0 or lower, or use a version of the .NET SDK that supports .NET 6.0. |
You may need to change the .NET 6 SDK version when you make it. Or you can have 6.0.x here.
The next task is to build the project. In the arguments configuration, we will specify the build OS, or you can use --runtime parameter instead. Basically this task is to make sure the project can build successfully.
Save the pipeline and run it then see if it works.
Define a version variable
We will need to add another task to publish the project to Artifactory. In this step, we will specify the release version number, then we can release it to an Azure WebApp in the future.
I will show you how to define the version number in different ways and you can choose what you prefer.
This publish task is where we need to define the version variable. The basic way is to define it in the YAML file.
Define a variable in YAML file
Add a version variable in the variables section of the YAML file:
1 | version: '1.1.0' |
We will use it later.
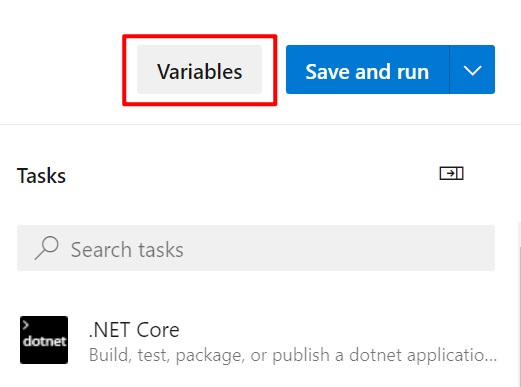
Define a variable in Classic UI
The alternative way to set up a variable is the Classic UI. Click the Variables button on the right top corner in the edit page.
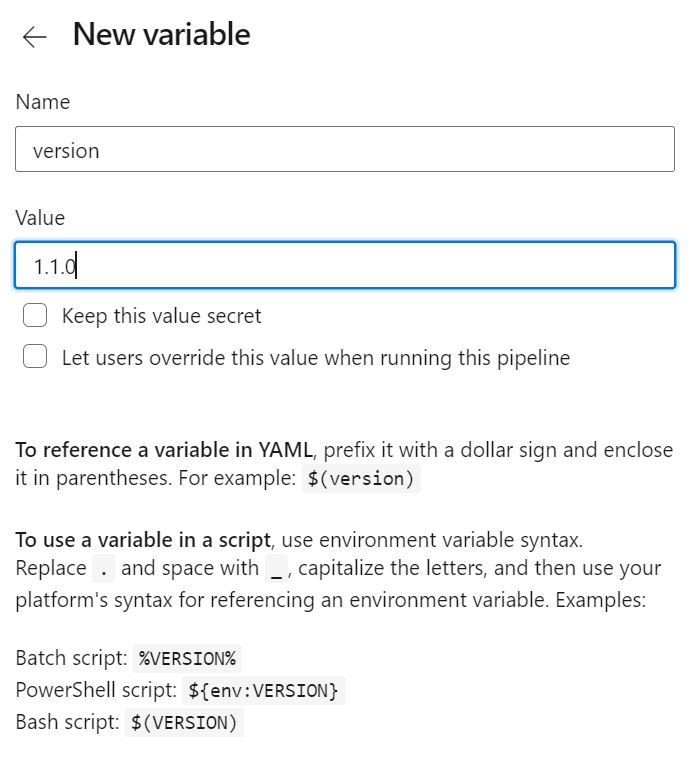
You can find more information here: Manage pipeline variables.
Define a variable in variable groups
Another way is to define it in variable groups. But normally variable groups are used to make variables available across multiple pipelines so it is not really for this case. You can find my another article for using variable groups to inject configurations to different environments: Using Azure DevOps Pipelines to inject configurations when deploying ASP.NET Core App to Linux host.
You can use either way. Defining variables in the YAML file is recommended because this allows you to track changes to the variable in your version control system.
Add a publish task
Add a task in the YAML file pipeline:
1 | - task: DotNetCoreCLI@2 |
In this task, we specify the output folder as $(Build.ArtifactStagingDirectory), which is a pre-defined variable in Azure DevOps. You can find more available variables here: Use predefined variables. We also use $(version) to refer the version variable. This is called Macro syntax variable, and you can only use it for stages, jobs, and steps. They are not available in resource or trigger. For more information, please check Understand variable syntax.
Next we will need to publish the build artifacts. Add a task as below:
1 | - task: PublishBuildArtifacts@1 |
If you already created the version variable, you can click Save and run button to run the pipeline.
The full YAML file is shown as below:
1 | trigger: |
Check the artifacts
Once the pipeline runs successfully, you can download the artifacts here:

Check the properties of the dll files and see if the version number is correct.
Extract the version number into a separate YAML file
It works well so far. But the next question is - what should we do if we want to update the version number?
When we defined the version variable, it is actually stored in the same pipeline YAML file. If we want to update the version number for the next build, we must edit the pipeline definition directly (or enter the edit page of the pipeline if you use the classic UI), then update the value. It is not ideal to maintain it because we don’t want to change the pipelines often.
In this section, I will show you how to achieve version number as code.
To do this, we should not define the version variable in the build pipeline YAML file. Instead, we will need to create a separate file to store the version number, then read it in the build pipeline YAML file. When we want to update the version number, we just need to update the version number file, and no need to touch the build pipeline YAML file anymore. In the version number file, we will follow the semantic versioning - define the major, minor and patch numbers only, and the pipeline will generate the last revision number automatically.
Create a separate file for version number
Next, let’s create a new file called app-variables.yml file in the root folder. Now your root folder should have two YAML files: azure-pipelines.yml, which is created by Azure DevOps; and app-variables.yml.
Edit the app-variables.yml file as below:
1 | variables: |
Read the variable and use it in the pipeline
Next we need to read this variable in the original pipeline YAML file. Update the file as the following code:
1 | trigger: |
Note that the change for the variables. We added a template field to refer the app-version.yml file, and use ${{variables.versionMajorMinorPatch}} to read the value defined in the template. This is a template expression, which is different with macro syntax we mentioned before. For more explanation, please check Runtime expression syntax and Variable reuse.
Ok now you should be able to build the project again and see if the published files have been updated to the new version number you defined in the separate YAML file. Next time if you need to change the version number, then just update the app-version.yml only, and no need to touch the azure-pipelines.yml file anymore.
Increase the revision number
The next step is to automatically increase the revision number by the pipeline. So we can see different revision number based on the build number for each build/release. For example, when the version is 1.1.0, every time the pipeline runs, it will increase a revision number in sequence, e.g. 1.1.0.0, 1.1.0.1… and so on.
We can use expressions to calculate the revision number. Update the YAML file as below:
1 | trigger: |
We added a new variable called versionRevision with the value $[counter(${{variables.versionMajorMinorPatch}}, 0)]. It uses counter function to evaluate a number that is incremented with each run of a pipeline. There are two parameters for this function: prefix and seed. For this case, the value of versionRevision will be 0 in the first run of the pipeline. If the value of versionMajorMinorPatch does not change, in the second run it will be 1. For more information about counter function, check Expressions - counter.
If you edit the app-version.yml file and update the value of versionMajorMinorPatch to be a new value, then in the next run of the pipeline, the value of versionRevision will be 0. Subsequent runs will increment the counter to 1, 2, 3, …
Let’s change the version as 1.2.1 in the app-version.yml file and push it. You will see the build log as below:
1 | C:\hostedtoolcache\windows\dotnet\dotnet.exe publish D:\a\1\s\BuildVersionDemo\BuildVersionDemo.csproj -o win-x64 --configuration Release --output D:\a\1\a\BuildVersionDemo /p:Version=1.2.1.0 |
Now let’s run the pipeline again. You will see the revision number will increase to 1 so the version would be 1.2.1.1.

If you change the version as 1.2.2 in the app-version.yml file and push it, you will see the counter will be reset to 0, which is exact what we want.
The benefit of this way is we have the version number in a separate file, which can be managed by the source control system. So you don’t have to edit the version number in Azure DevOps UI or in the pipeline file, which is less risky. Also the pipeline can automatically increase the revision number based on the main version number. That is how we manage version number as code.
The full YAML file is shown below. You can easily customize it for your requirements.
app-version.yml:
1 | variables: |
azure-pipelines.yml:
1 | # ASP.NET |
An alternative approach
Sometime you may have more complex requirements for these variables. You can use scripts to generate output variables and pass them to the next job/task. Find more information about Azure DevOps Pipelines variables: Set variables in scripts.
Here is another example to read version numbers and pass it to the next job:
1 | # ASP.NET |
This pipeline adds another job to read the variables then sets the variables in the scripts. It allows you to have more capabilities to control these variables, or you want to do something that isn’t supported by the default tasks. You need to use task.setvariable command in the scripts. For more information, see Set variables in scripts.
Summary
This article won’t cover the release/deployment. You can create a new release pipeline for your application. Because when we publish the artifact, the correct version number has been applied so once your Web API is ready, the client can get the correct version number through the endpoint. You can find a bunch of resources from Microsoft Doc: Azure Pipelines.
In this article, we learned how to have a separate file to store the version numbers. You can have any other variables in this file and include it in the main pipeline YAML file. You can also read the variable directly or have a script for more complex tasks. With this way, the version number is easily maintained in a separate file so we can manage it as code.
Some important documents are already listed in the article. Hope this is helpful for your Azure DevOps journey.
Thanks for reading!