Four ways to generate code in C# - Including Source Generators in .NET 5
Microsoft introduced Source Generator in the latest C# version. It is a new feature that allows us to generate source code when the code compiles. In this article, I will walk you through four ways that can generate source code to simplify our daily jobs. Then you can choose the proper way for various scenarios.
Good developers are lazy developers because they don’t want to repeat the code over and over again. In the .NET world, we have such ways to help us generate code:
- Code snippets.
- Reflection.
- T4 Template.
- [New] Source Generators in .NET 5.
Maybe you have more ideas but this article will mainly cover these four ways. You can check my repo for this article: https://github.com/yanxiaodi/MyCodeSamples/tree/main/CodeGeneratorDemo. Let’s get started!
Code snippets
Code snippets are small blocks of reusable code that can be inserted in our code files by using a combination of hotkeys. For example, if you type prop then press Tab in Visual Studio, VS will automatically generate a property in your class, then you can easily replace the property name. VS already provides us with lots of built-in code snippets, such as prop, if, while, for, try, etc. You can find the list of all default code snippets here: C# code snippets.
The benefit of code snippets is you can replace the parameters. For example, when we use MVVM pattern for UWP/Xamarin/WPF apps, we often need to create properties in the class that implements INotifyPropertyChanged interface. If you use MvvmCross framework, it may look like this:
1 | private ObservableCollection<Comment> _commentList; |
We do not want to copy/paste then change the variable names so I created a code snippet to simplify the work. Create a new file called myMvvm.snippet and copy & paste the below code:
1 |
|
In this code snippets, we use <Shortcut> section to specify the shortcut mvxprop, and use <Declarations> section to declare some parameters. For instance, we declared a parameter named Property, then insert it to the snippet using $Property. You can import this code snippet by Code Snippets Manager from VS Tools menu (or press Ctrl+K, Ctrl+B).
Now you can type mvxprop and press Tab, VS can create the property for you - you just manually replace the property names.
For more information:
Code snippets are suitable to reuse to insert entire classes or methods or properties. You can also distribute the code snippets to other users. It is useful when we create the new files/classes/methods. But if you want to update the generated code after it is done, you have to delete the existing code then recreate it. Basically, it saves the time from boring copy/paste, but it is a once-only use.
Reflection
Reflection is widely used in many .NET frameworks and libraries, such as ASP.NET Core, Entity Framework Core, etc. It can provide object of type Type that describes assemblies, modules and types so you can dynamically create an instance of a type, get the type from an existing object then invoke its methods or access its fields and properties.
When we build the .NET application, it generates assemblies - such as the .dll files. These assemblies contain our modules, which contain some types. Types contain members. Reflection allows us to read the information of these. So we can dynamically load new .dll files and call the methods or events of them without editing the code. Dynamically means it works at runtime. In other words, when we compile the application, the .NET app does not know what types we need to use, until it runs. By this way, we can create a client that can dynamically execute methods in other assemblies based on our rules. If we update the classes in other assemblies following the rules, we do not need to update the client code.
Let us check the below sample. You can find it in my sample project. We have an interface called ISpeaker in the CodeGeneratorDemo.ReflectionDemo.Core project as shown below:
1 | namespace CodeGeneratorDemo.ReflectionDemo.Core |
Create two implementation classes:
ChineseSpeaker:
1 | namespace CodeGeneratorDemo.ReflectionDemo.Core |
and EnglishSpeaker:
1 | namespace CodeGeneratorDemo.ReflectionDemo.Core |
Now we can use reflection to find all the implementations of ISpeaker interface and call their methods or properties.
Create a new file named ReflectionHelper in the CodeGeneratorDemo.ReflectionDemo project:
1 | using CodeGeneratorDemo.ReflectionDemo.Core; |
In this class, we load the specified dll file that contains types we need. Then we can apply the LINQ query to find all the implementations of ISpeaker interface using Reflection.
In the CodeGeneratorDemo.Client project, we can output the name and call SayHello method of each speaker:
1 | private static void ReflectionSample() |
Run the program, you will see the below output:
1 | Here is the Reflection sample: |
If we need to add other speakers in other languages, just add the implementation classes in the same project. .NET reflection can automatically find out all the required classes and call the methods correctly.
It is extremely useful when we create the plugin-type applications. First we make the interfaces and call the methods from the client by reflection. Then we can create plugins following the interface for the client, which can be loaded as the *.dll files dynamically and executed.
Another scenario is for the framework development. As a framework developer, you will not be able to know what implementations the users will create, so you can only use reflection to create these instances. One example is in some MVVM frameworks, if you create the classes following the conventions, eg. xxxViewModel, the framework can find all the ViewModels and load them automatically using reflection.
Generally, when people talk about reflection, the main concern is the performance. Because it runs on runtime, so theoretically, it is a little bit slower than the normal application. But it is flexible for many scenarios, especially if you develop the framework. If it is acceptable to spend a few seconds (or only hundreds of milliseconds) to load assemblies, then feel free to use it.
The main namespaces we need to use for reflection are System.Reflection and System.Type. You may also need to know the below terms:
- Assembly
- Module
- ConstructorInfo
- MethodInfo
- FieldInfo
- EventInfo
- PropertyInfo
- ParameterInfo
- CustomAttributeData
For more information, please check these docs:
T4 Template
T4 Text Template is a mixture of text blocks and control logic that can generate a text file. T4 means text template transformation. You can use it to generate files in Visual Studio for C# and Visual Basic. But the file itself can be text of any kind, such as .txt file, or a HTML file, or a program source code of any languages. You use C# code(or VB) to control the logic in the template. A couple of years ago, I used to use a NuGet package (EntityFramework Reverse POCO Generator) to generate the POCO models for EntityFramework. It is implemented by the T4 template. I just needed to update the database connection string in the T4 template and save it, then the T4 template can read the database information and automatically create all the models and methods.
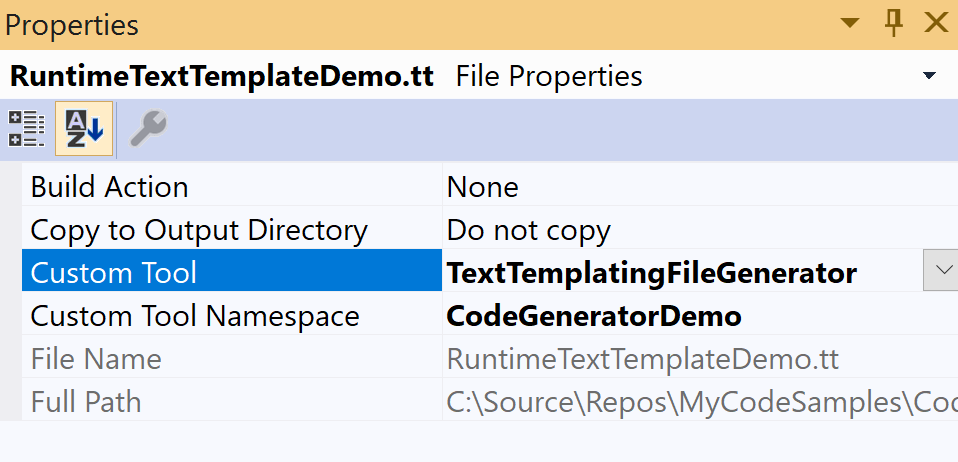
Let us see how the magic happens. There are two kinds of T4 templates: Run-Time and Design-Time. The difference is that the run time T4 template is executed in the application to generate the text strings. It will create a .cs class which contains a TransformText() method. Then you can call this method to generate the strings even the target machine does not have Visual Studio installed. On the contrary, the design time T4 template generates the raw source code or text files when you save the template in Visual Studio. If you want to use the run time T4 template, you need to set the Custom Tool property of the file as TextTemplatingFilePreprocessor. For design time T4 template, the Custom Tool property should be set to TextTemplatingFileGenerator.

You can find the samples in the CodeGeneratorDemo.T4TemplateDemo project. There are two T4 templates: RunTimeTextTemplateDemo.tt and DesignTimeTextTemplateDemo.tt.
Run-Time T4 Template
To build the project correctly, you need to install the System.CodeDom NuGet package. Open the RunTimeTextTemplateDemo.tt file, make some changes to the HTML code, then save it. You will see the T4 template automatically update the generated file RunTimeTextTemplateDemo.cs. There is a method called TransformText() you can use in the client code.
1 | < |
Every time you save the template, it will update the generated file. In the client code, we can call the below code:
1 | var page = new RunTimeTextTemplateDemo(); |
You will see the HTML code in the console.
Design-Time T4 Template
Design-Time template can only be used in the Visual Studio when you develop the program. It generates the raw text files, whatever the format is - it can be .cs, .html, or .txt. Typically, you will need to define a model, which could be a text file (XML or JSON or csv or whatever), or a database, then the template reads the data from the model and generate some of your source code.
Here is an example:
1 | < |
When you save the template, the T4 template can generate the Model and the Service for each class.
How to create a T4 Template
As you see in the above examples, the T4 templates are composed of the following parts:
- Directives - elements that control how the template is processed.
- Text blocks - the raw text that is copied directly to the output.
- Control blocks - program code that inserts variable values into the text, and controls conditional or repeated parts of the text.
For example, you can use the below directive to specify the output file format:
1 | < |
You can also use C# code to control the logic. For example, check this code:
1 | < |
It will output Hello four times. In this example, Hello is a text block, and the for statement is just the C# code.
To use the variables, you can use the expression control blocks. Just use <#= ... #> to output the variables, as shown below:
1 | < |
It will output Hello four times as well.
The powerful feature of T4 template is that you can import assemblies and use most of .NET libraries you need, eg:
1 | < |
Just note that you need to place them before the raw text and control blocks. You can even use Reflection in the control blocks. With these features, we can write quite useful templates for some scenarios.
Debug the T4 Template
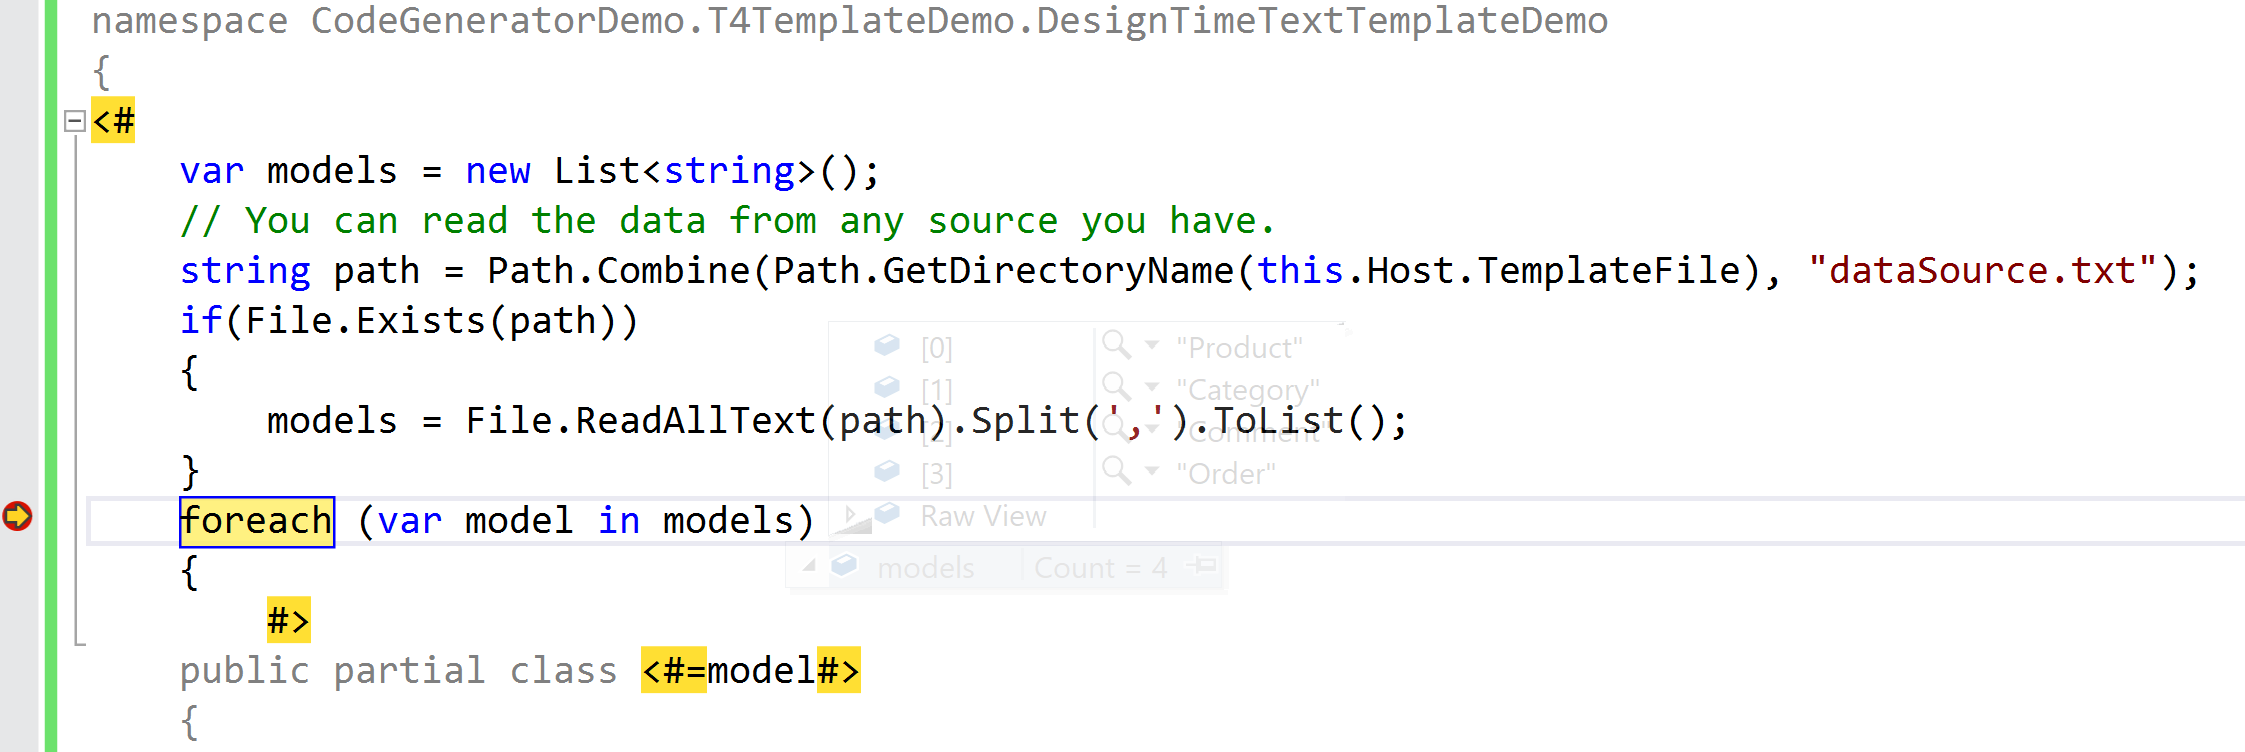
Like the normal C# program, we can debug the T4 template by setting breakpoints. To debug a design-time T4 template, right click the template and choose Debug T4 template from the menu of the file in Solution Explorer. To debug a run-time T4 template, just debug the project because it runs when the program compiles.

T4 Template editor
By default, Visual Studio does not support the syntax coloring and Intellisense, etc. Fortunately, we have some VS extensions to improve the productivity, such as DevArt T4 Editor. You can search T4 template in the VS extension market and you will find more.
We will not cover all the details of T4 template in this article. For more information, please read these documents:
- Code Generation and T4 Text Templates
- Walkthrough: Generate Code by using Text Templates
- Run-Time Text Generation with T4 Text Templates
- T4 Text Template Directives
- Text Template Control Blocks
- Guidelines for Writing T4 Text Templates
Source Generators in .NET 5
To get started with Source Generators, you need to install the latest .NET 5 SDK.
What is a Source Generator and how it works?
According to Microsoft’s definition:
A Source Generator is a piece of code that runs during compilation and can inspect your program to produce additional files that are compiled together with the rest of your code.
Let us recap how the Reflection works. As I mentioned before, when we build the application, the reflection code does not know what types it will use, until the application runs. That’s why people complain the performance of reflection. If we have lots of assemblies to load when the app starts, it may cause a slight impact to the performance. And this issue is hard to resolve because that is the downside of reflection - you get the benefit for the development, but you have to accept the disadvantage of it.
Source Generators are used to solve the performance issue - at least, to improve the performance is one of the important goals. Source Generators can analyze the current source code and inject into the code compilation process, then generate some code that will be compiled along the current source code - in other words, when the app completes the compilation, it already exactly knew what types it would use. That is the key to the improvement.
Here is the diagram of Source Generators from Microsoft:

One thing we need to know is that Source Generators can only add something to code but not change any existing code. Let us see an example.
My first Source Generator sample
A Source Generate is an implementation of Microsoft.CodeAnalysis.ISourceGenerator:
1 | namespace Microsoft.CodeAnalysis |
Create a new .NET Standard 2.0 Class project called CodeGeneratorDemo.SourceGeneratorDemo. Install these two NuGet packages:
- Microsoft.CodeAnalysis.CSharp v3.8+
- Microsoft.CodeAnalysis.Analyzers v3.3+
We also need to specify the language version as preview:
1 | <PropertyGroup> |
Technically, Source Generators are not a C# language feature. They are still in preview. So we need to specify it explicitly at the moment.
Then create a SpeakersSourceGenerator.cs file in the project. Update the content as shown below:
1 | using Microsoft.CodeAnalysis; |
The SpeakersSourceGenerator class implements the ISourceGenerator interface, and has the Generator attribute. When the program compiles, it will find the Source Generators and produce the code we need. In this example, I only created a new class named SpeakerHelper that contains one SayHello() method. If we generate the code correctly, it should output the message in the console.
Next, add the reference to the CodeGeneratorDemo.Client project. Please note that you need to update the project file like this:
1 | <Project Sdk="Microsoft.NET.Sdk"> |
You need to specify the language version as well. Also, because we do not reference the project as the normal dll file, so we need to update the values of OutputItemType and ReferenceOutputAssembly as shown above.
Add the code in the client code:
1 | private static void SourceGeneratorSample() |
You may see VS complains CodeGeneratorDemo.SourceGeneratorDemo.SpeakerHelper cannot be found because there is no such class in our code. The tooling of Source Generators is still in preview so we need to build the CodeGeneratorDemo.SourceGeneratorDemo project and close VS then restart it. Then you will find VS can support the Intellinsense as well. When we build it, the Source Generators actually generates the SpeakerHelper class. Now run the client app, we can see the output, which comes from the generated code:
1 | Hello from generated code! |
So the process is, when we build the project, the Source Generators will be called to produce some code that can be compiled with the original source code together. In that way, there is no performance issue because it happens in the compilation. When the app starts, the generated code is already compiled with the other source code.
From my experience, sometimes VS cannot recognize the generated methods or classes but that should be fine if the build runs correctly.

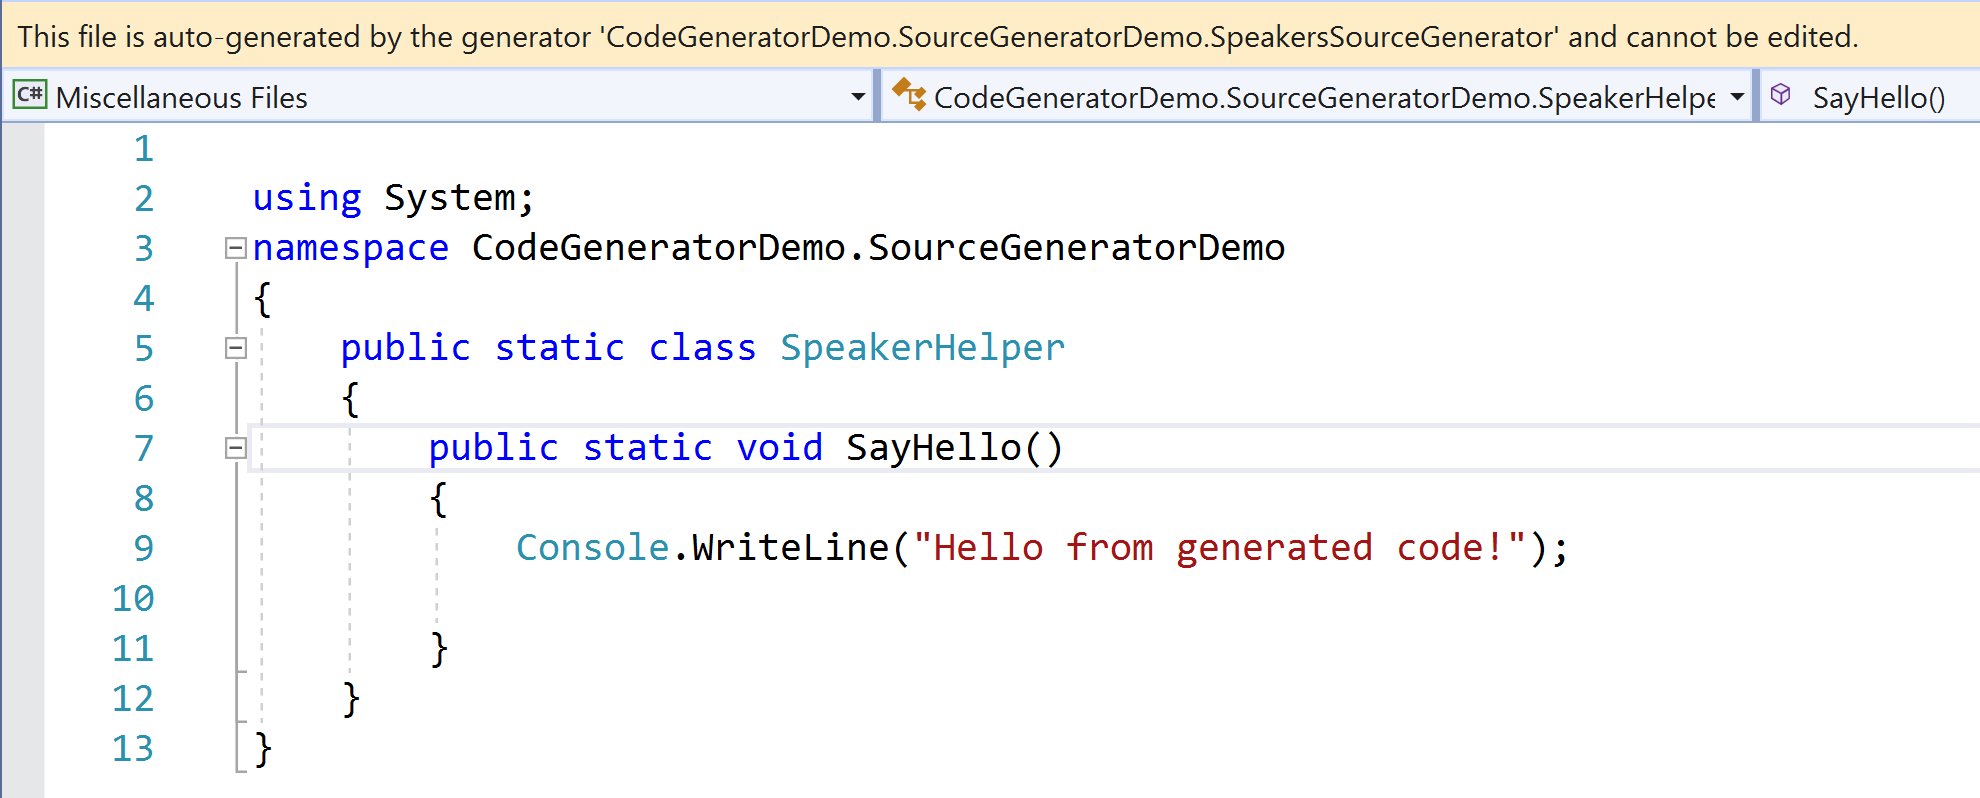
If you press F12 to inspect the SayHello() method in the client code, you will see the generated file which shows this file cannot be edited:

You might be curious where the file is. If you want to see the actual generated file, you can add these section to the CodeGeneratorDemo.SourceGeneratorDemo project and the CodeGeneratorDemo.Client project:
1 | <EmitCompilerGeneratedFiles>true</EmitCompilerGeneratedFiles> |
Then you can find the file in obj/GeneratedFiles folder. If you do not specify the CompilerGeneratedFilesOutputPath property, it should be in obj/SourceGeneratorFiles folder.
This is just a quite simple example to show how to generate the code before the runtime. Next, let us see another example that is a little bit more complex.
Generate an Attribute in compilation
When we use the Dependency Injection, normally we need to register the instances manually. For this demo, I will create an Attribute to decorate the classes that need to be registered. We can use Reflection to retrieve these attributes to find the specific classes, but the operation maybe expensive. With the Source Generators, we can generate the code to register them before the runtime.
Create a new class called AutoRegisterSourceGenerator as shown below:
1 | [] |
Next, let us create the attribute. We can create the actual class as the normal code, but for the demonstration, I will use Source Generator to generate it. Add the below code to AutoRegisterSourceGenerator:
1 | private const string AttributeText = @" |
This is just a string. Next, update the Execute method to add the string to the source code:
1 | public void Execute(GeneratorExecutionContext context) |
When we build the project, it will generate the AutoRegisterAttribute.
The next step is to create some interfaces:
1 | namespace CodeGeneratorDemo.Client.Core |
And some implementations, such as OrderService and ProductService, which are decorated by the AutoRegister attribute:
1 | using System; |
We do not have AutoRegister in our code at the moment. So you will see VS complains. It does not matter because the attribute will be generated by the Source Generator later.
We will have another class called DiContainerMocker to mock the DI container:
1 | using System; |
The Source Generators rely on Roslyn. It can inspect the data from compilation. We can access the SyntaxTrees by using an object called SyntaxReceivers, iterate the SyntaxNodes then generate codes based on these information.
Create a new class called MySyntaxReceiver, which implements the ISyntaxReceiver interface:
1 | public class MySyntaxReceiver : ISyntaxReceiver |
In this class, we will check each SyntaxNode. If it is a class and it has attributes, then we will add it to a list.
Next, we need to register MySyntaxReceiver in the Initialize method of the Source Generator:
1 | public void Initialize(GeneratorInitializationContext context) |
Now it is time to complete our Source Generator. The idea is that we will hook the compilation and check if the SyntaxNode is a class and has the AutoRegister attribute. Update the Execute method by the following code:
1 | public void Execute(GeneratorExecutionContext context) |
If you are not familiar with Roslyn, this method may look like complicated. It uses Roslyn API to get the metadata of the classes - kind of similar with Reflection. You can check the documents for more information:
- Work with syntax
- Work with semantics
- Explore code with the Roslyn syntax visualizer in Visual Studio
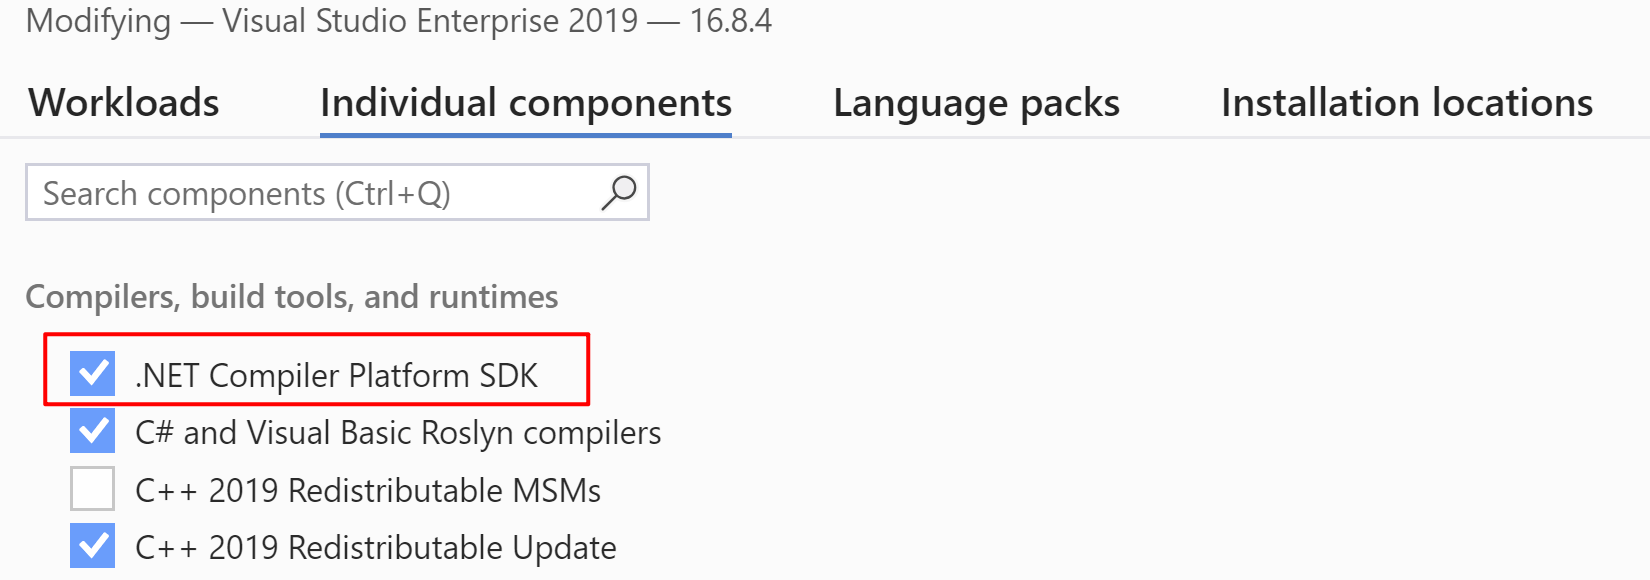
To better check the syntax trees in our project, you can install .NET Compiler Platform SDK from Visual Studio Installer, which provides a SyntaxVisualizer window for VS2019.

Once we find the classes decorated by the AutoRegister attribute, we can append the source code which can register the instance. The generated code will be compiled with the original code together. By this way, we avoid the expensive cost of Reflection and improve the performance.
Finally, we can call the generated code in the client:
1 | private static void SourceGeneratorSample() |
You need to build the CodeGeneratorDemo.SourceGeneratorDemo project then reopen the VS2019. Then you can see the output like this:
1 | Here is the AutoRegisterAttribute Source Generator sample: |
If you press F12 on RegisterServices() to check its definition, you will see the generated code is like this:
1 | using System; |
That is exactly what we want.
The cool thing is if you remove or add the AutoRegister for the services, you will see the generated code will be updated immediately - no need to rebuild the project!
How to debug the Source Generators
Sometimes we need to debug the Source Generators in case we have any issues. If you set a breakpoint in the Source Generator, you will find it will not work. The solution is to attach the debugger in the Initialize method:
1 | public void Initialize(GeneratorInitializationContext context) |
Then you can debug the Source Generator by setting the breakpoints.
How can we deal with the complicated template code?
In these two examples, I demonstrated how to generate code using Source Generators. We use the raw strings in the Execute method - it seems ugly. The better way is to use a template engine. One possible option is Scriban - a fast, powerful, safe and lightweight scripting language and engine for .NET. So we can store the templates in separate files and make the solution tidy. I will not dive deep to the template syntax because it is out of the scope of this article. You can find more on its GitHub repo.
Usage scenarios
Microsoft provides a Source Generators cookbook. You can find it on GitHub: https://github.com/dotnet/roslyn/blob/master/docs/features/source-generators.cookbook.md. You will see the Source Generators can be applied in many scenarios, especially to replace Reflection, or when you develop the boilerplate codes. For example, some JSON serialization often use dynamic analysis, such as Reflection to examine the type in runtime. Source Generators can generate static serialization code in compile-time to save the cost. You can also access additional files, such as XML or JSON files to generate your code.
Find more examples on GitHub: https://github.com/dotnet/roslyn-sdk/tree/master/samples/CSharp/SourceGenerators.
Summary
In this article, I walked you through four ways that we can use to generate code in our C# program. They may fit for different scenarios, so we need to compare each approach and choose the appropriate one.
| Scenarios | Pros | Cons | |
|---|---|---|---|
| Code Snippets | To create code blocks in specific format, such as properties, methods, and classes, etc. | Save the time to type repeating code blocks. | Can only applied to specific format. Cannot be updated automatically. |
| Reflection | To get the metadata in runtime then interact with the classes, properties, methods, etc. | Powerful and flexible for many scenarios. Can reduce the coupling. | Expensive cost. Potential performance issue. More complex to maintain. |
| T4 Template | To generate some boilerplate code. But sometimes it can be refactored by design patterns. | Can read data from other files. Many available control blocks. Can generate static code without performance issue. | Terrible editor support. Easy to make mistakes in the template. |
| Source Generators | To replace some reflection code. Generates static code in compilation based on Roslyn. | No performance issues. Faster build. IntelliSense support. Can produce diagnostics when unable to generate source code. Partial classes/methods support. | Tooling needs improvements. A little bit hard to get started. |
The point is how we use Source Generators - the new features provided in .NET 5. It is still in preview so we may see more improvements from Microsoft soon. My expectation is the better integration with VS2019. Now the experience is not good enough because we must reopen VS repeatedly. Hope this article would help you save your time on C# development. Feel free to leave your comments if you have any ideas, please. Thanks.