How to develop a VS Code Extension - Translator Helper
In my last post, I introduced Translator Helper - a VS Code Extension that helps you translate documents to other languages. In this post, I will introduce how to develop it from scratch.
It is not very hard to develop a VS Code extension, but it is quite hard to develop a good one. Let us get started from a “Hello World”. You can find detailed documentation on VS Code site: https://code.visualstudio.com/api.
First, we need to think about which category our extension is:
- Theming: Change the look of VS Code with a color or icon theme
- Extending the Workbench: Add custom components & views in the UI
- Webview Guide: Create a Webview to display a custom webpage built with HTML/CSS/JS
- Language Extensions Overview: Support a new programming language
- Debugger Extension Guide: Support debugging a specific runtime
You should focus on different APIs for each category. For my case, I want to read and insert the text in the file, so it belongs to Extending the Workbench. Next I will introduce how to develop a VS Code extension like Translator Helper.
Creating your first VS Code Extension
You can find the tutorial here: https://code.visualstudio.com/api/get-started/your-first-extension
First, make sure you have Node.js and Git installed on your machine. Use npm to install Yeoman and VS Code Extension Generator:
1 | npm install -g yo generator-code |
Then navigate to an empty folder, use the command below to create a new project:
1 | yo code |
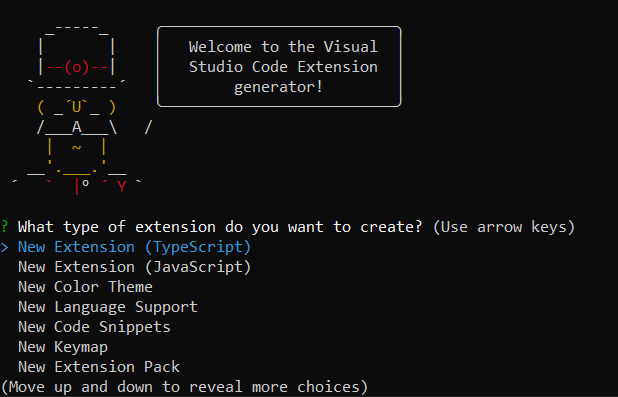
The CLI will ask you some questions to complete the project. The first question is like this:

Here we need to select proper options based on my specified functionalities. For my extension, I use TypeScript because I love strong type. The output is shown below:
1 | # ? What type of extension do you want to create? New Extension (TypeScript) |
So a new VS Code Extension named helloworld will be generated and opened by VS Code. You can just press F5 to run the project and you will see a new VS Code window that has loaded this extension.
Press F1 or Ctrl+Shift+P, then input Hello World, you will see there is a message box shown on the right bottom corner, which shows Hello World. That means the extension works.
The most important code is placed in the extension.ts file. Open the file and have a look:
1 | // The module 'vscode' contains the VS Code extensibility API |
It is quite straight forward. In the activate method, it uses vscode.commands.registerCommand() method to register a command, then uses vscode.window.showInformationMessage() method to show the message box.
Requirement Analysis
My requirement is simple: the user can press Keyboard Shortcuts to translate the current paragraph to the specified target language, then insert the translated text after the current paragraph. Because I found that the paragraph is the best unit for translation. No need to translate the whole article because it might lose some key information and we also need to proofread the text. Let check out the supported APIs of VS Code.
You can find all the APIs here: https://code.visualstudio.com/api/references/vscode-api. We need to interact with the current editor interface and implement the functionalities that allow us to automatically select and insert the text, etc. So I found an API named TextEditor: https://code.visualstudio.com/api/references/vscode-api#TextEditor:
It seems that this object can help us operate the text in the editor.
So now we have got an idea: we will register the keyboard shortcuts and the commands, automatically select the current paragraph then send the text to the translation API, at last, insert the result after the current paragraph.
Operating The Text
I created a class called DocService to operate the text in the editor, such as selecting a paragraph, inserting a paragraph, etc. The code is shown below:
1 | class DocService { |
Calling Google Translation API
We use Google Translate API to translate the text. It is just a simple HTTP request. For simplicity, we can use an npm package named @vitalets/google-translate-api to do it. The code is like this:
1 | class GoogleTranslationService implements ITranslatorService { |
Implementing The Core Function
Now we can combine these code snippets together. Create the function by following the “hello world” sample:
1 | let translateInsert = vscode.commands.registerCommand('translatorHelper.translateInsert', async () => { |
It is easy to understand. We call getParagraph() method in DocService class to automatically get the text of the current paragraph, send the orignial text to Google Translate API then insert the returned text after the current paragraph.
Configurations & Contribution Points
It will not work if you just register the commands in the code. We also need to update package.json to configure the new commands. There is an important concept called Contribution Points in VS Code extension development. You can find the documentation here: https://code.visualstudio.com/api/references/contribution-points. Contribution Points are a set of configurations in the package.json file, which is used to declare some properties of the extension, such as short cuts, commands and settings, etc. Here is an example:
1 | "activationEvents": [ |
The code above shows that it registers an event which will be invoked by the command namedtranslatorHelper.translateInsert . Another example is shown below:
1 | "contributes": { |
I added a command named translatorHelper.translateInsert, which is exact same with the one in the last code snippet. Also, I added a keybindings, so that when the user presses Alt+T, the command will be invoked.
contributes.commands: https://code.visualstudio.com/api/references/contribution-points#contributes.commandscontributes.keybindings: https://code.visualstudio.com/api/references/contribution-points#contributes.keybindings
Extension Configuration
We should provide users with the capability to set up the translate languages. The API we need to use for this purpose is contributes.configuration. VS Code provides a unified API to manage the configurations for all the extensions in one place. To enable configurations for my extension, I need to add the below code to the contributes section in package.json :
1 | "configuration": { |
The configuration could be text, enum or other types. You can also set the default value and add descriptions, etc. After that, you can see the configuration options in the dropdownlist on the configuration page. The detailed API is here: https://code.visualstudio.com/api/references/contribution-points#contributes.configuration.
For my case, I can read the configurations by the below code:
1 | let config = vscode.workspace.getConfiguration("translatorHelper"); |
Now the basic functionalities of the translator extension are ready to go!
Testing
Testing is very important in the software development process, especially in the DevOps process. Good testing helps us improve the quality of the software. We can follow the instruction to create tests for the VS Code extension: https://code.visualstudio.com/api/working-with-extensions/testing-extension.
The default project template has a full test case integrated already, which is in the src/test folder. We can easily update the test cases. I added a default markdown file named test.md in the src/test/suite folder, which contains a “Hello World”. When the test runs, VS Code will load this file automatically and execute the command to translate it. Some code snippets are shown below:
1 | test("Should get the correct translation then insert it.", async () => { |
This piece of code will automatically load the text file and call 'extension.translateInsert' command, then compare the translated text with expected text. If it contains the expected text, that means the extension works as expected.
Bundling
You might be aware that the VS Code extension is similar to the front-end app which contains JavaScript/TypeScript. For apps developed by JavaScript or TypeScript, loading lots of small files is slower than loading one big file. So usually, we need to use some bundlers to bundle the code and reduce the size of the app. There are quite a few different bundlers available, such as rollup.js, webpack, etc. For our case, we use webpack as the bundler. That is also the recommended way of VS Code: https://code.visualstudio.com/api/working-with-extensions/bundling-extension
Install webpack by typing this command:
1 | npm i --save-dev webpack webpack-cli |
Then install ts-loader to add supports to TypeScript for webpack:
1 | npm i --save-dev ts-loader |
After that, a webpack.config.js will be added to the project. In addition, we need to update the package.json file to use webpack for bundling:
1 | "scripts": { |
If you have experience with front-end development, you may find that is easy to config.
Publishing
It is time to publish our extension. Before doing it, we need to install vsce which is a command-line tool for packaging, publishing and managing VS code extensions. Run this command to install it:
1 | npm install -g vsce |
We also need to register an account in Marketplace to get the Access Token. Here is the instruction for publishing:https://code.visualstudio.com/api/working-with-extensions/publishing-extension
I do not want to copy & paste the documents here so you can find detailed steps in the document above. Just keep in mind that if you do not create a Publisher, you will not be able to use the command to publish the extension.
CI/CD
It is tedious to publish the extension manually for each update. The best way is to integrate CI/CD by Azure DevOps. Here is the documentation to describe how to build a Pipeline:https://code.visualstudio.com/api/working-with-extensions/continuous-integration.
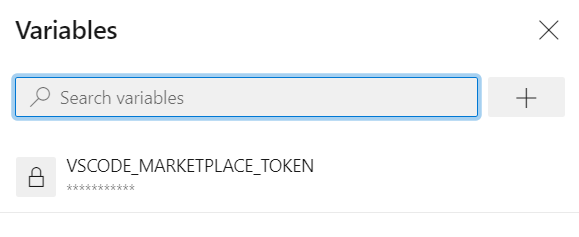
Note that we need to use Access Token to publish the extension, but this token is sensitive information so we need to create a variable to store the token in the Pipeline, then use is in YAML file.

The code of the YAML file is shown below:
1 | trigger: |
It uses $(VSCODE_MARKETPLACE_TOKEN) to retrieve the Access Token. In the trigger section, we set up the trigger to specify the trigger branch and the conditions. So that every time I commit a Pull Request, the Pipeline will be automatically triggered then publish the extension to the Marketplace.
Icon & README
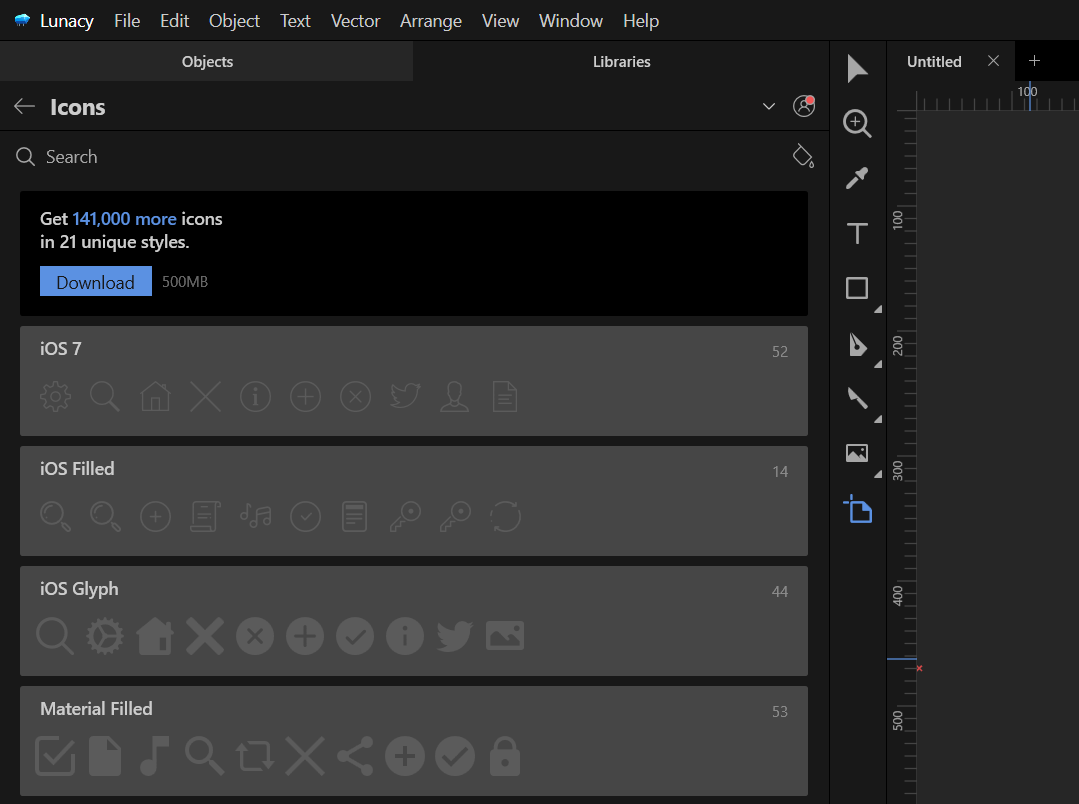
Another important thing is the manifest information of the extension, including the icon and README, etc. To make the icon, I recommend using Lunacy, which you can download from Windows 10 Store for free. This tool has a bunch of beautiful free icons. Also, you can download the extension icon packs that include more than 100,000 icons.

Place the icon file in the project folder, and config it in the package.json file:
1 | "icon": "images/icon.png", |
In addition, you need to define the attributes of the extension, such as id, display name, description, version, publisher, repo link, VS Code version, etc. You can also add some badges to show the status like build status, current version, downloads, reviews. etc. For more details, please read this documentation: https://code.visualstudio.com/api/references/extension-manifest
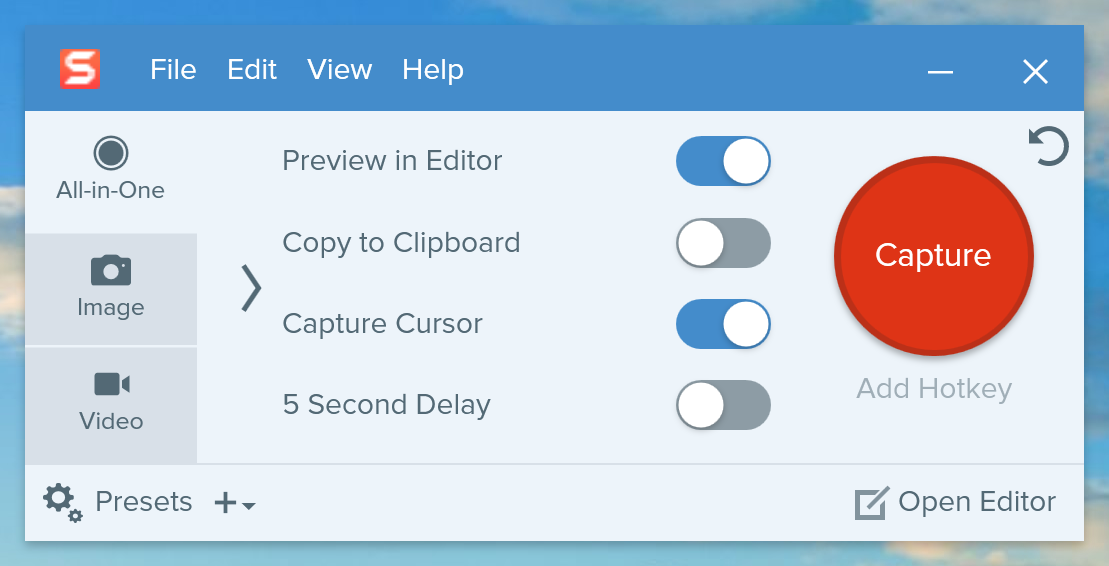
The README file is shown on the extension page in Marketplace. You better make a couple of GIF files to show what the extension can do. There are lots of tools to make GIF files. I use SNAGIT, which is a good software to capture your screens.

Summary
This is a very simple VS Code extension - you might find that the core method is just less than 50 lines. But it definitely improves my work efficiency. What I learned from it is that when you cannot find a good tool, why not make if yourself? The progress is fun! The project is open-sourced on GitHub: https://github.com/yanxiaodi/vscode-translator-helper. All feedback and advice are welcomed.
Happy Coding!