Using Azure DevOps Pipelines to publish the NuGet package from GitHub repo
I have got used to configure Azure DevOps Pipelines with the classic editor that allows us to configure lots of properties of the tasks with a friendly user interface. But the better way to configure the Pipelines is by using YAML file. It is easy to fine-tune each option for your Pipeline, and easy to clone & share. That is why YAML is the default Pipelines configuration template in Azure DevOps nowadays. I have developed a simple NuGet package that integrates Azure DevOps to build and publish. I will demonstrate how to create a new pipeline with YAML file. Before we get started, let us spend several minutes to gain a basic understanding of YAML.
What is YAML?
YAML(YAML Ain’t Markup Language) is a human friendly data serialization standard for all programming languages.
– yaml.org
YAML is designed to be human-friendly and work well with modern programming languages for common everyday tasks. It is similar to JSON. Actually, you could treat YAML as the superset of JSON. Every JSON file is also a valid YAML file. But the difference is that they have different priorities. The foremost goal of JSON is simplicity and universality so it is easy to generate and parse in every modern programming language. But for YAML, the foremost design goal is to improve human readability. So YAML is a little bit more complex to generate and parse.
Imagine how we can describe a basic data structure? There are three basic but important primitives: mappings (hashes/dictionaries), sequences (arrays/lists) and scalars (strings,/numbers). We could describe the structures of JSON like this:
- A collection of name/value pairs. An object starts with
{and ends with}. Each name is followed by:and the name/value pairs are separated by,. - A list/array of values. An array begins with
[and ends with]. Values are separated by,. - A value can be a string in double quotes, or a number, or
trueorfalseornull, or an object or an array. These structures can be nested.
Let us see how it is in YAML. There are similarities between YAML and JSON. We will not cover all the details of YAML because Azure DevOps Pipelines does not support all features of YAML.
name/value
YAML also contains a set of name/value pairs. You do not need to use { and }. The left of : is the name and the right of : is the value. For example:
1 | name: myFirstPipeline |
Note that the string in YAML does not need to be quoted. However, they can be.
The value can be a string or number, or true or false or null, or an object. YAML uses indentation to indicate nested objects. 2 space indentation is preferred but not required. For example:
1 | variables: |
collections
YAML uses [] to indicate an array. For example:
1 | sequence: [1, 2, 3] |
Another way is to use - , as shown below:
1 | sequence: |
multiple data types
| indicates there are multiple data types available for the keyword. For example, job | templateReference means either a job definition or a template reference are allowed.
comments
JSON does not support comment but you can use # for comments in YAML.
The structure of YAML for Pipelines
When we set up the pipelines in Azure DevOps, we use Stages, Jobs and Tasks to describe a CI/CD process. One pipeline might contain one or more stages, such as “Build the app” and “Run tests”, etc. Every stage consists of one or more jobs. Every job contains one or more tasks. Let us see the hierarchy of the YAML file for the pipeline:
- Pipeline
- Stage A
- Job 1
- Step 1.1
- Step 1.2
- …
- Job 2
- Step 2.1
- Step 2.2
- …
- Job 1
- Stage B
- Job 1
- …
- Stage A
You do not need all these levels because sometimes the pipeline only contains a few jobs so just tailor the steps for your specific requirement.
Creating your first task in Azure DevOps Pipelines
Applying Azure DevOps Pipelines for your project
You can host your project on Azure DevOps Repo or GitHub. Azure DevOps Pipelines supports lots of repository providers, such as GitHub, Bitbucket or other Git system.
If your project is hosted on GitHub, you can easily install the Azure Pipelines plugin from GitHub Marketplace:
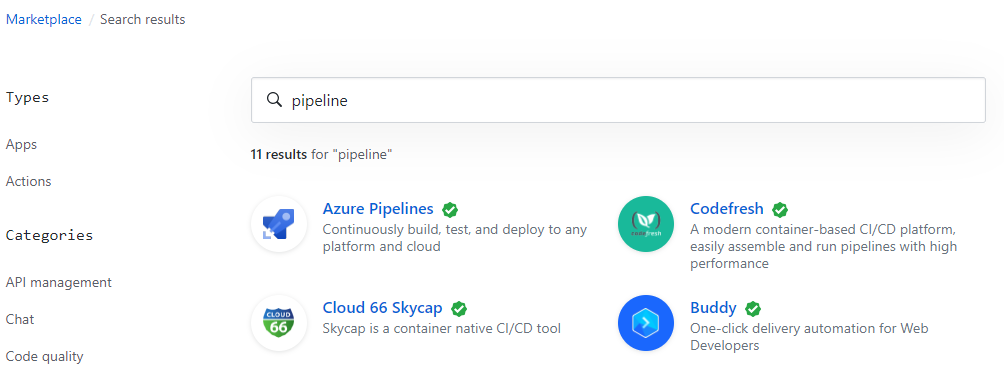
Search pipeline in Marketplace then click Azure Pipelines. It will guide you to install it into your project. Next, you could see your project in Azure DevOps.
Another way is creating a new blank project in your Azure DevOps and just enable the modules you need. Then connect to your project repository and build the first pipeline following the guide.
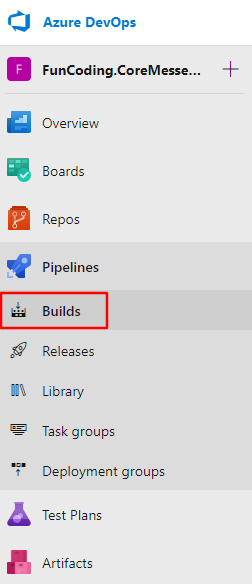
Let us create a new pipeline to build the project. Click Pipelines in the Azure DevOps menu, then select Builds:
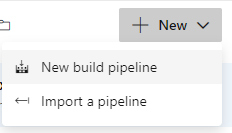
Click New - New build pipeline:
Azure DevOps Pipelines will ask you where the project is:
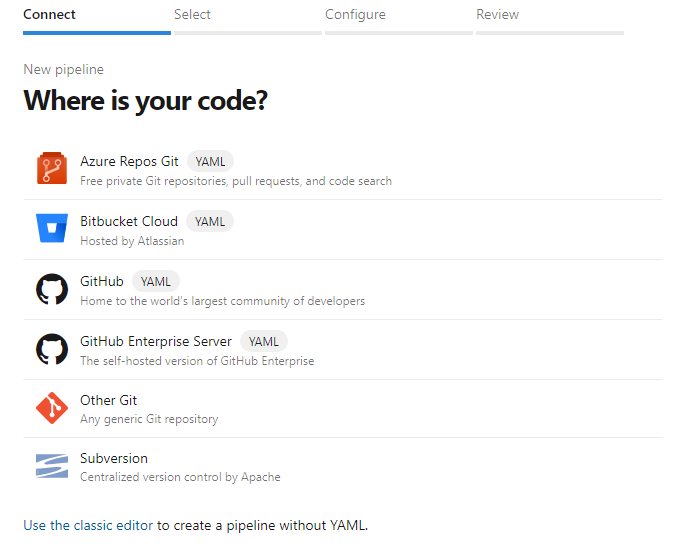
If you prefer the classic editor, feel free to click Use the classic editor. But this time, I will use YAML. So I click GitHub(YAML) option and select the repository. Azure Pipelines will analyze the repository and recommend a pipeline template for the project. If Azure Pipelines could not analyze what type your project is, you could configure it manually:
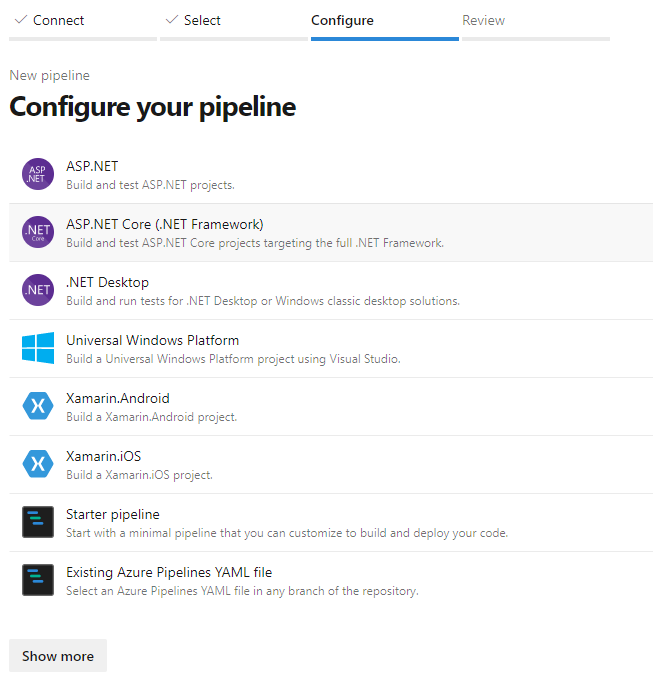
I will build the pipeline from scratch. So I select Starter pipeline. Obviously, you could select one template for the specific type of your project to simplify the process. You can also click Show more to check more available templates.
Once you select a template, Azure Pipelines will create a file named azure-pipelines.yml at the root of your repo. The default template for starter pipeline is shown below:
1 | # Starter pipeline |
The content of the file might vary depending on your project.
You can change the file name by clicking the file name link:
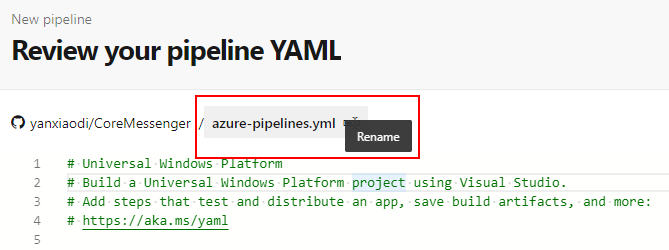
Setting up the trigger
We have gained the fundamentals for YAML. Let us investigate the content of this YAML file. The first key is trigger that means Push trigger. It specifies what branch will cause the build process when you push the changes. If you do not specify this value, every time you push to every branch will trigger a build.
For trigger key, there are different options but at the moment, we just need to know, we can set up a branch name here, as shown below:
1 | trigger: |
If you want to add more branches, just add the elements like this:
1 | trigger: |
You can also configure the include, exclude for branches, tags and paths. The full syntax is:
1 | trigger: |
You can use wildcards to specify a branch of a tag. Wildcards patterns allow you to use ***** to match zero or more characters and ? to match a single character. For more details, please visit Wildcards in triggers.
Another type of triggers is PR trigger which specifies what branches will cause a pull request build to run. But keep in mind that this feature is only available for GitHub and Bitbucket Cloud. If you are using Azure DevOps Repos, you can configure branch policy for build validation to trigger the build for validation.
I am using GitHub, so I will use the code below to trigger the build when I have a new Pull Request to the master branch:
1 | pr: |
Setting up the pool
The pool is used to specify which pool to use for the job. The full syntax is:
1 | pool: |
Azure DevOps provides us lots of Microsoft-hosted pools. You could find them here: Microsoft-hosted agents.
Of cause, you are able to use your private pool but you need to create your build agent first. It is out of the scope of this article.
I want to build the project on the Windows platform so I would change vmImage to windows-2019 that runs Windows Server 2019 with Visual Studio 2019. So this section would be:
1 | pool: |
If you are developing a .NET Core application, you could use the Linux platforms such as Ubuntu by using the code below:
1 | pool: |
Running the first Pipeline
The next sections are some scripts. Before we change them, we can save the pipeline first and try to run it. Click Save and run on the right top corner. You can change the commit message before saving it. You will see the result as shown below:
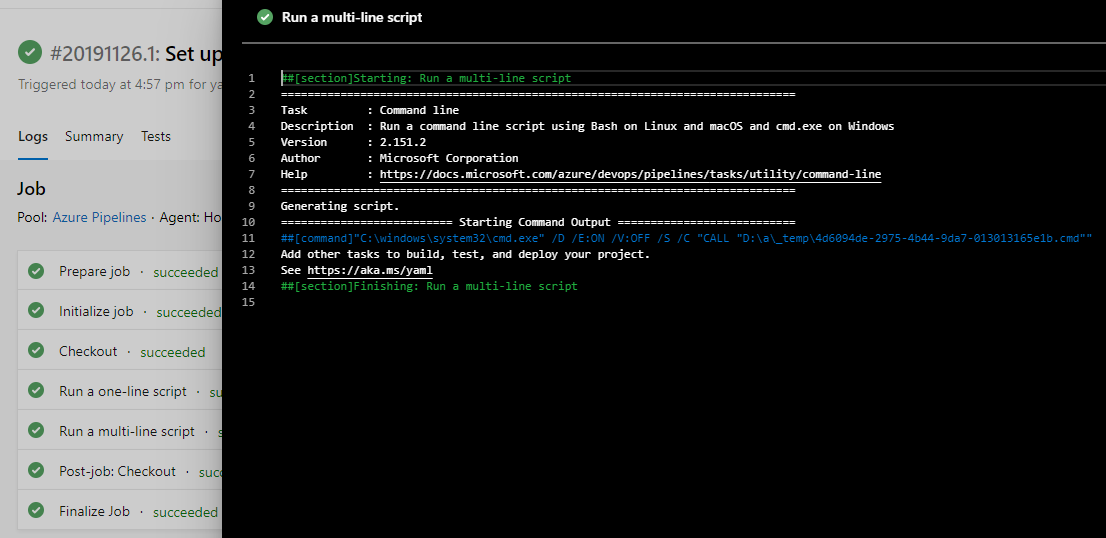
Actually, this default pipeline template just shows how to run a one-line script and a multi-line script that output echo messages. We need to add our tasks to build the project.
Adding tasks to the pipeline
Let us figure out the hierarchy of pipeline tasks. We can use Stage, Job and Step to classify the tasks. Basically, a stage is a collection of related jobs. A job is a collection of steps. Steps are a series of specific operations that make up a job, such as running a piece of script, or copying files. One example is shown below:
1 | stages: |
As we mentioned, you do not need all of them. If your pipeline has only one stage and one job, you can omit stage and job and only use steps.
Creating the first step
I prefer to start from the easiest way. So let us just ignore stage and job. First, I will add steps to build the project. The first step is to install the .NET Core SDK.
Delete the echo scripts in the default pipeline, then add the steps section as shown below:
1 | steps: |
Please DO NOT just copy & paste it. Try to type it to test the powerful editor of Azure DevOps Pipelines. When you type dotnet for the task name, you could find that the editor automatically shows a list that contains this keyword:
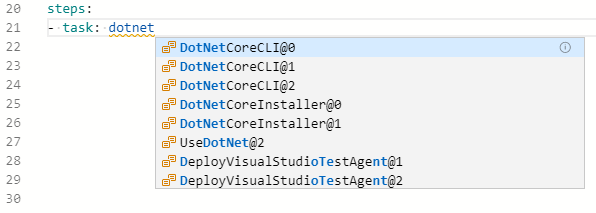
That is a similar experience of IntelliSense in Visual Studio. You will love it. Move your up or down key then press Enter to select UseDotNet@2. You will find there is a grey Settings link above the task:

Click Settings, you will see the configuration panel on the right side:
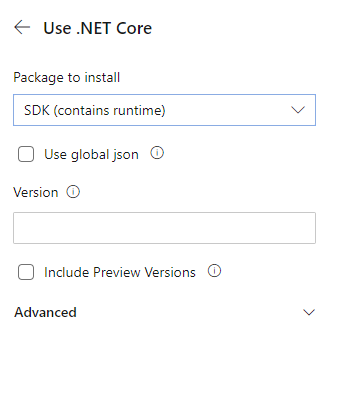
It saves time to remember the names of the parameters. Type 2.x in the Version textbox, then click Add. The task will be added to the pipeline:
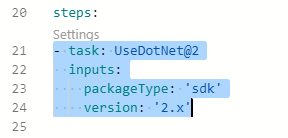
The editor supports wonderful IntelliSense when you type:

The next question is, how can we know the parameters we need to use? For .NET Core tool, check the documentation here: Use .NET Core task.
Azure DevOps Pipelines supports lots of tasks, such as Build tasks, Tool tasks, Test tasks, Deploy tasks and Utility tasks, etc. You can find the list here: Build and release tasks.
Building the project
Now we have installed the .NET Core SDK for our project. Next, we need to call .NET Core CLI to build the project. Add a new task in the current steps section, and select DotNetCoreCLI@2 because we are using .NET Core v2.x. When you see the Settings link above the task, you can easily configure it in the task configuration panel:
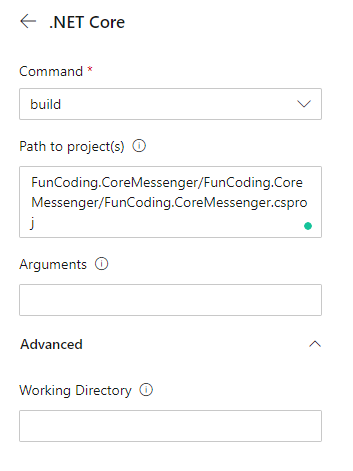
The new task is shown below:
1 | - task: DotNetCoreCLI@2 |
When you specify the path to project(s), you can use wildcards (e.g. **/*.csproj for all .csproj files in all subfolders). You can also specify arguments for the build command.
Let us keep it as simple as possible at the moment. Click Save on the right top corner, and input your commit message, then click Save:
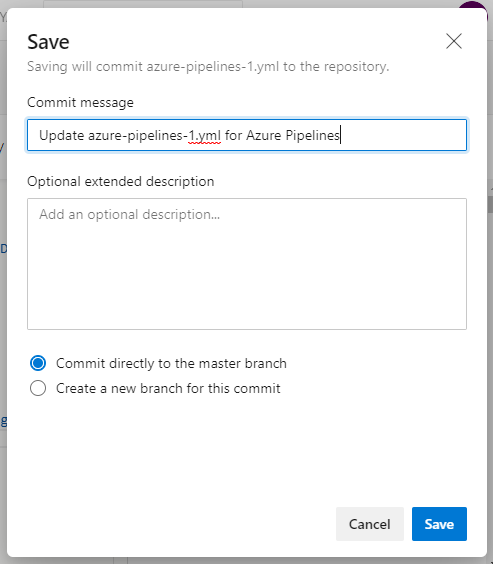
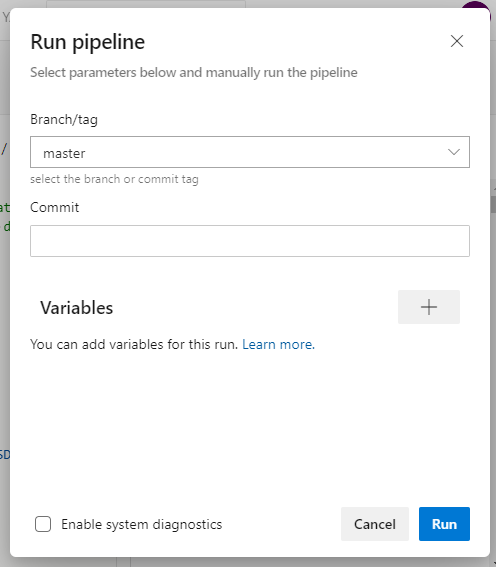
Once you saved the pipeline, you can run it by clicking Run on the right top corner. Select the correct branch/tag, then click Run:
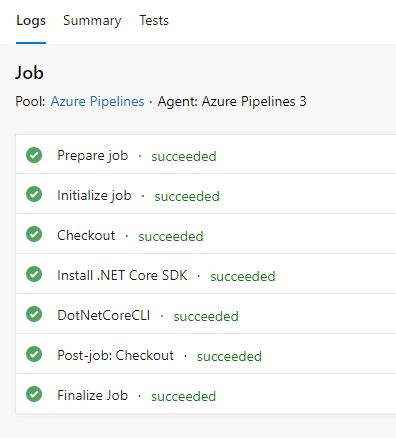
You will see the pipeline runs correctly:
Adding parameters for .NET Core CLI
When we use the dotnet build command of .NET Core CLI, the default configuration is debug. We need to specify the release mode. So we can add a configuration parameter like this:
1 | - task: DotNetCoreCLI@2 |
If we just need a build pipeline for the PR validation, that is enough. We only need to validate the build, and no need to pack and publish the packages. But for the release, we need to pack the project and publish the *.nupkg file. So let us move on.
Publishing the artifact
The next step is to use dotnet pack command of .NET Core CLI to pack the code into a NuGet package, then publish it to a folder for the release.
Packing the package
The dotnet pack command builds the project and creates NuGet packages. We need to add another task to use this command. Select DotNetCoreCLI@2 task and click Settings:

We need to select pack command. Then choose the correct path to the project to pack. We can keep the Configuration to Package and the Package Folder as the default values. For Do not build checkbox, we can make it checked because we have completed the step to build in the previous step. In the Pack options, we can select the versioning pattern. For more details:
Versioning schemes
For byPrereleaseNumber, the version will be set to whatever you choose for major, minor, and patch, plus the date and time in the format
yyyymmdd-hhmmss.For byEnvVar, the version will be set as whatever environment variable, e.g.
MyVersion(no $, just the environment variable name), you provide. Make sure the environment variable is set to a proper SemVer e.g.1.2.3or1.2.3-beta1.For byBuildNumber, the version will be set to the build number, ensure that your build number is a proper SemVer e.g.
1.0.$(Rev:r). If you select byBuildNumber, the task will extract a dotted version,1.2.3.4and use only that, dropping any label. To use the build number as is, you should use byEnvVar as described above, and set the environment variable toBUILD_BUILDNUMBER.
For this demo, I do not want to publish a formal release to NuGet. So I select byPrereleaseNumber. It will attach a suffix after the Major.Minor.Patch version so it will be a pre-release version. Pre-release version is a label that has a - followed by whatever letters and numbers you want. For example, version 1.0.0-beta, 1.0.0-build12345 are all pre-release versions of 1.0.0. This is called SemVer which means semantic version number. You can find more details here: Semantic Versioning. When we need to publish a formal release version, we will not use this type of pack options. Another easy way to do it is to hardcode the version number in the *.csproj file, and set the Pack options as Off here. We can also add arguments for dotnet pack command, such as dotnet pack -p:PackageVersion=2.1.0. In addition, we can find some other tools to help us simplify this job, such as DotNetTools. You can use these tools or write PowerShell scripts to update the version number.
The pack section looks like this:
1 | - task: DotNetCoreCLI@2 |
If the pipeline runs correctly, it will pack the project and generate the package file *.nupkg into $(Build.ArtifactStagingDirectory) , which is a predefined variable of Azure DevOps. For your information: Predefined variables.
Using variables
At the moment, we have not specified the build configuration. The default value for most projects is Debug. So we need to assign Release to this parameter. Also, we found that both of these two tasks contain the project path. So we could use variables to simplify the script.
Variables allow us to define some key/value pairs that can be reused. Also, it is a good way to avoid hard-coding in the script. When Azure DevOps Pipelines executes the tasks, the variables will be replaced with the correct values.
Azure DevOps already provides some predefined variables, as we mentioned in the last section. We can also define our own variables. Let us add some variables after the pool section:
1 | variables: |
Then we can apply these variables in the tasks by using $(variableName):
1 | - task: DotNetCoreCLI@2 |
The pipeline will work as expected.
Actually, we can use dotnet push command to push it to the NuGet package seed in the build pipeline. But it makes a little bit confusing because literally, the build pipeline should only do the build job. So I will create another release pipeline to push it to the NuGet package seed.
Publishing artifacts
The next step is to publish the NuGet package file so the release pipeline is able to push it to NuGet package feed. Add a new task by typing publish and select PublishBuildArtifacts@1:

You can find more details about this task here: Publish Build Artifacts task.
Click Settings and keep the default settings then click Add:
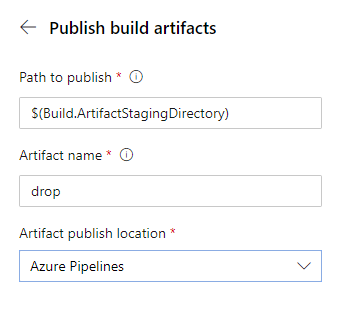
When we pack the project, the default setting of Package Folder is $(Build.ArtifactStagingDirectory). So in the publishing step, the task will get the NuGet package file from $(Build.ArtifactStagingDirectory) and publish it to Azure Pipelines, or a file share. The script is shown below:
1 | - task: PublishBuildArtifacts@1 |
Ok, now when this pipeline is triggered, it will build the project, then pack and publish the NuGet package to Azure Pipelines. We can click Artifacts on the build pipeline result page then click drop:
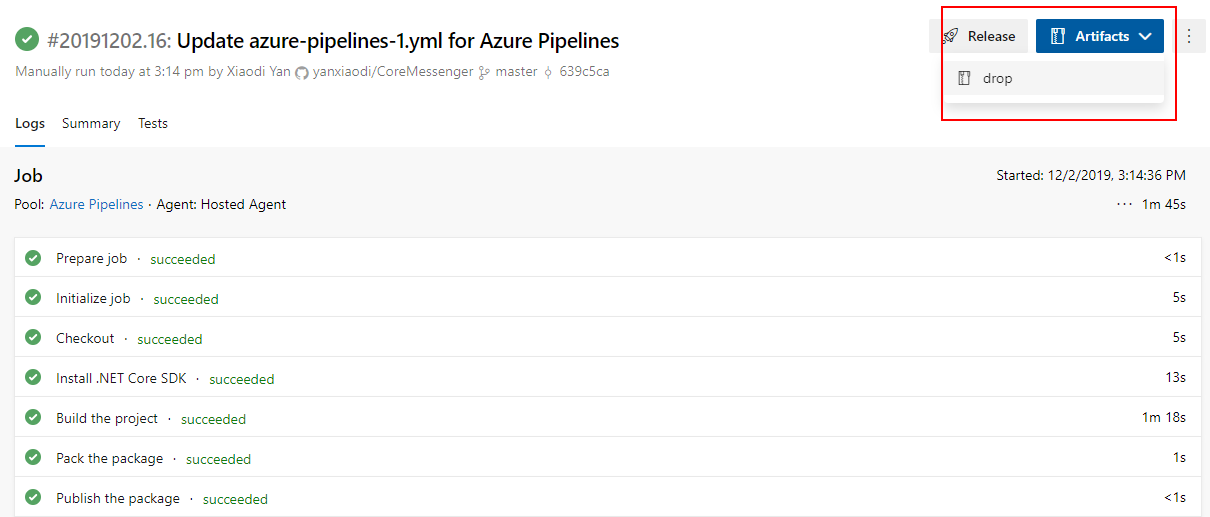
We can see the *.nupkg is right here:
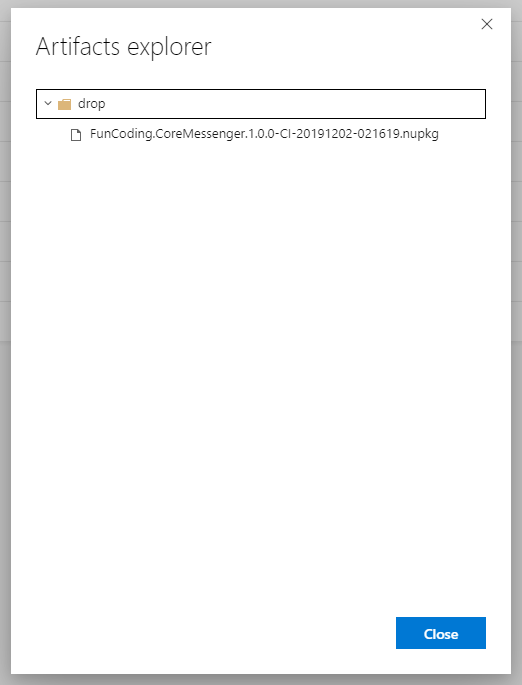
Note that the name of the *.nupkg file will be changed after each build because we selected byPrereleaseNumber as the Pack options. If you use different versioning schemes, the name may vary.
Pushing *.nupkg file to NuGet package feed
Usually, we should have another branch named release to release the package. But for simplicity, I continue to use master branch for the release pipeline. Please keep in mind that this is not a good practice of GitFlow. I just want to focus on the YAML stuff. You can easily change the target branch in the script.
Creating the release pipeline
Let us create a release pipeline. Click Pipelines in the Azure DevOps menu, then click Releases in the right side:
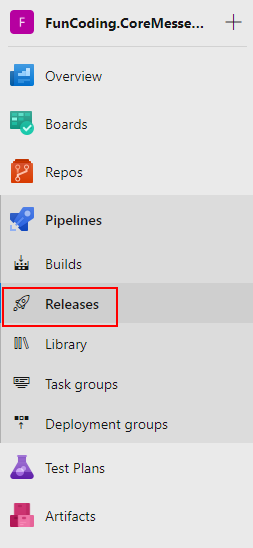
In the new window, click New pipeline. You will see a page like this:
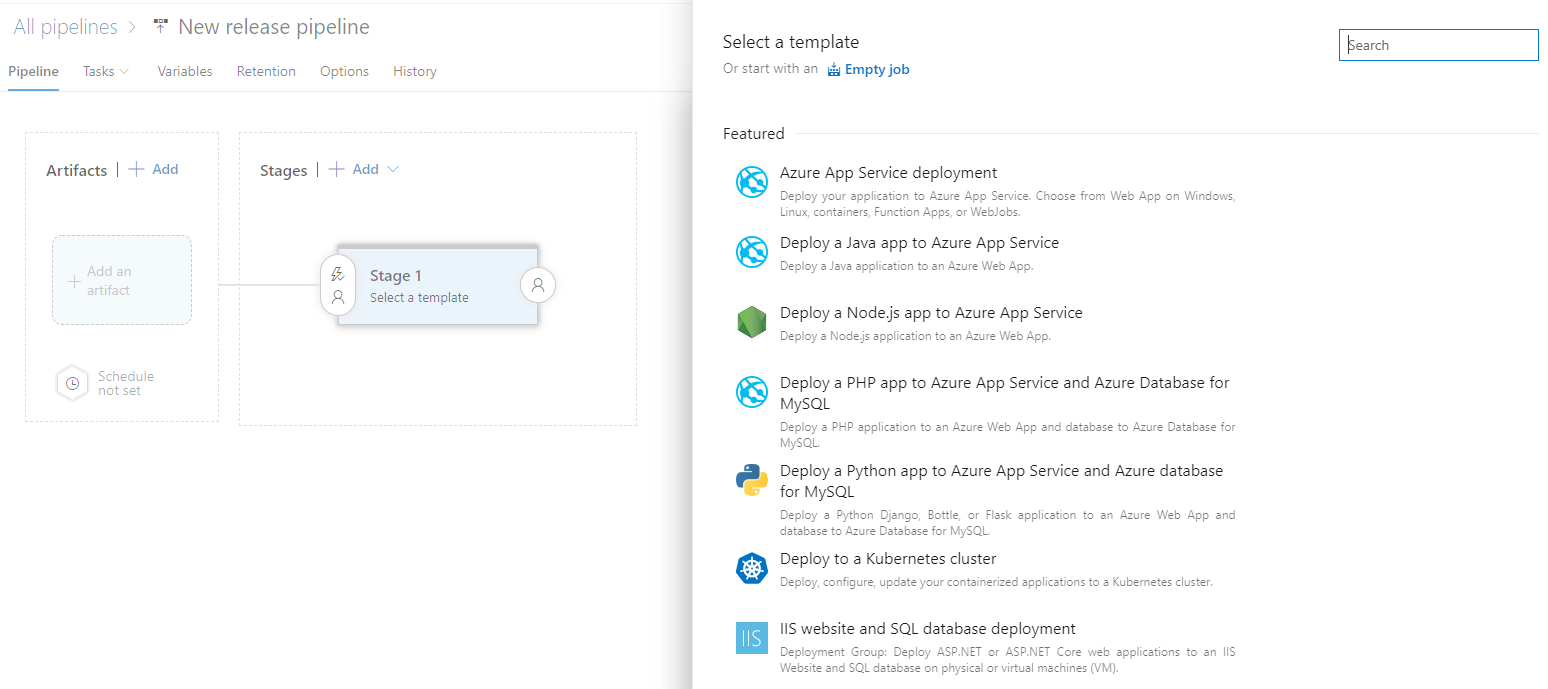
We will build the pipeline from scratch so please click Empty job:
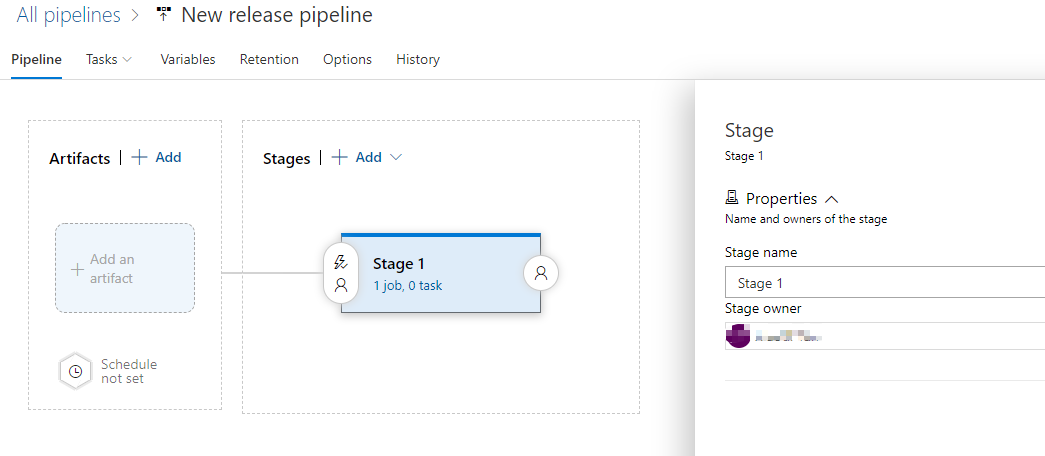
Adding the artifact
Click Add an artifact, then you will see a page to configure the artifact:
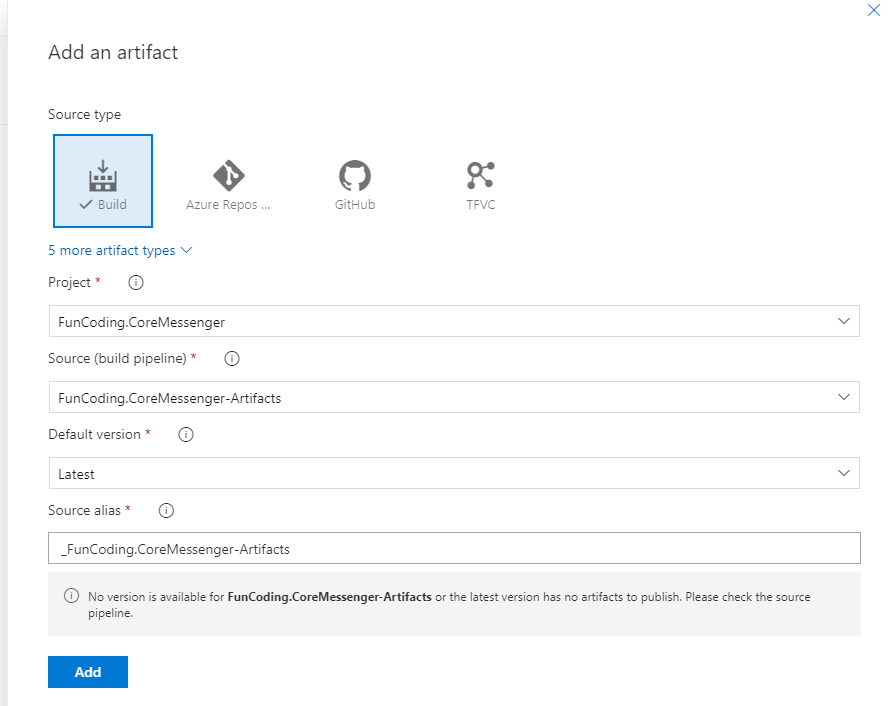
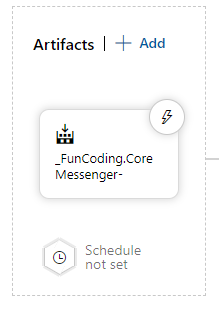
Select the right build pipeline for the release. Then click Add. The artifact will be shown here:
Adding tasks
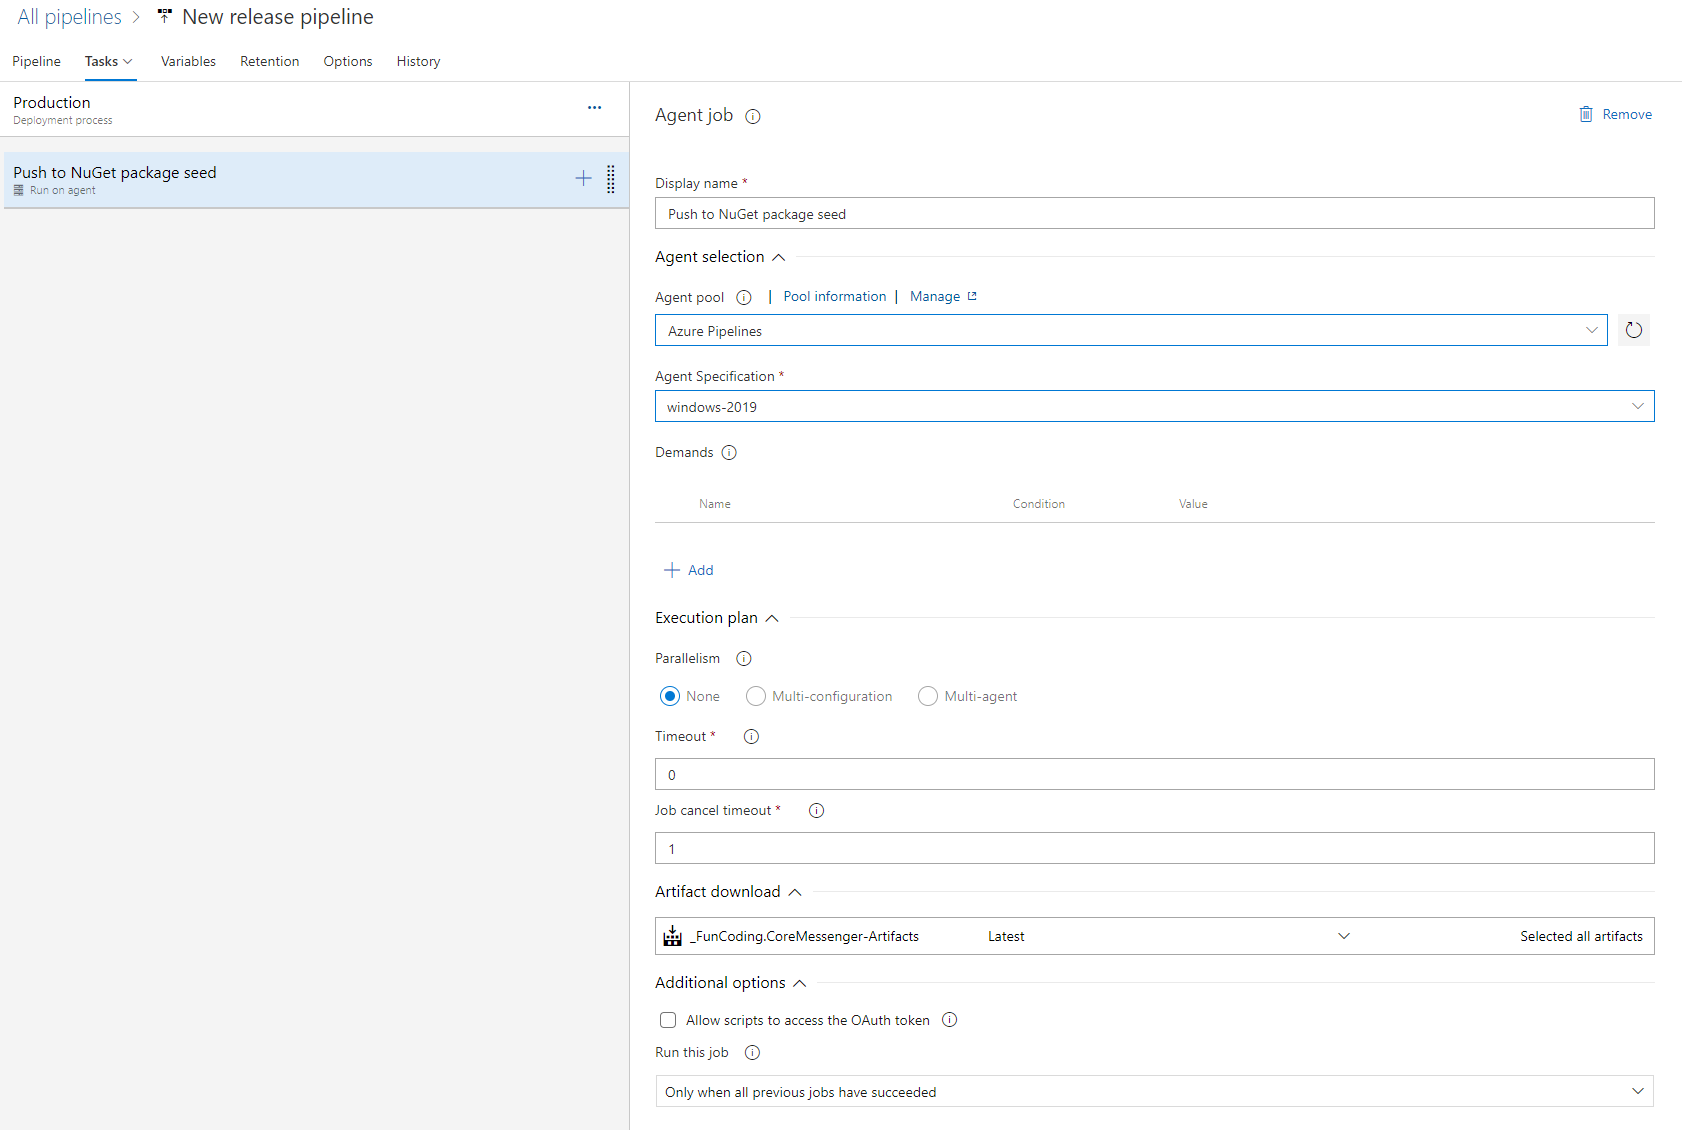
Then click 1 job, 0 task link below Stage 1. You can update the details of the Stage and the Agent pool:
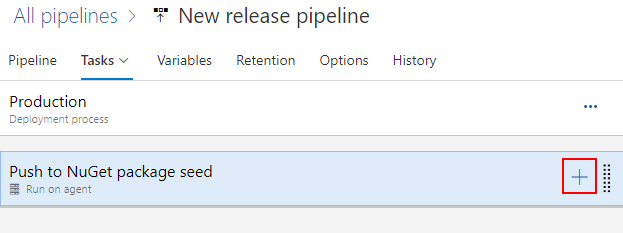
Click the + on the right of the job:
You will see a page that shows all the tasks available in Azure DevOps:
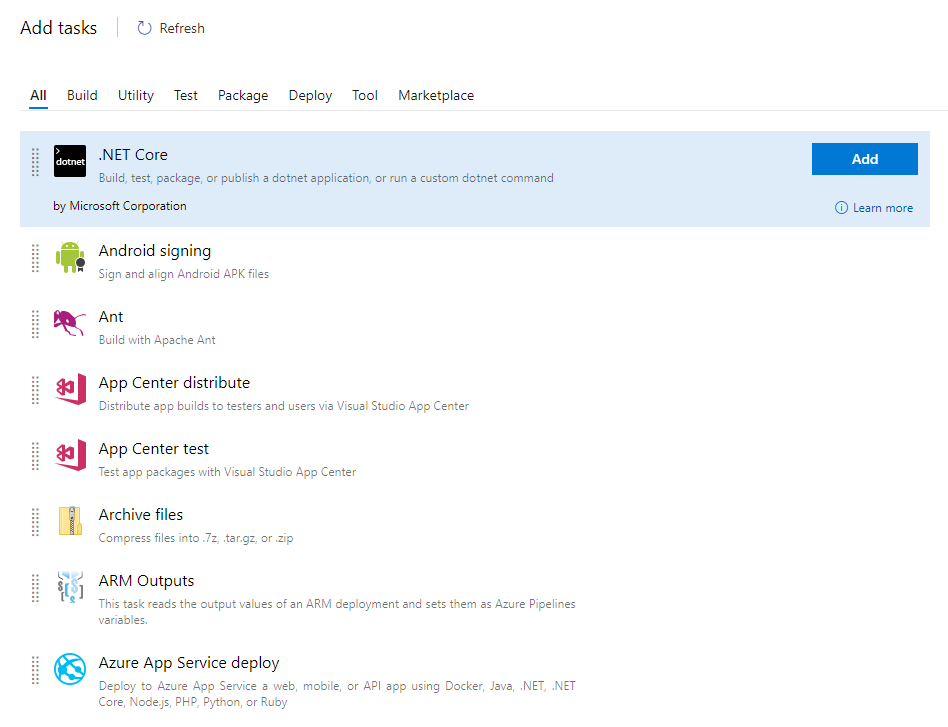
Before I wrote this article, I thought I could use dotnet push command to push the package to the NuGet package seed, so I selected .NET Core task and selected nuget push command from the Command list. But I found that .NET Core CLI threw an error:
1 | Error: DotNetCore currently does not support using an encrypted Api Key. |
I found an issue on GitHub: DotNetCore currently does not support using an encrypted Api Key. At the moment, using an ApiKey is currently not supported in .NET Core CLI because the required libraries for encrypting the key are not available. So we need to use NuGet tool to push the package:
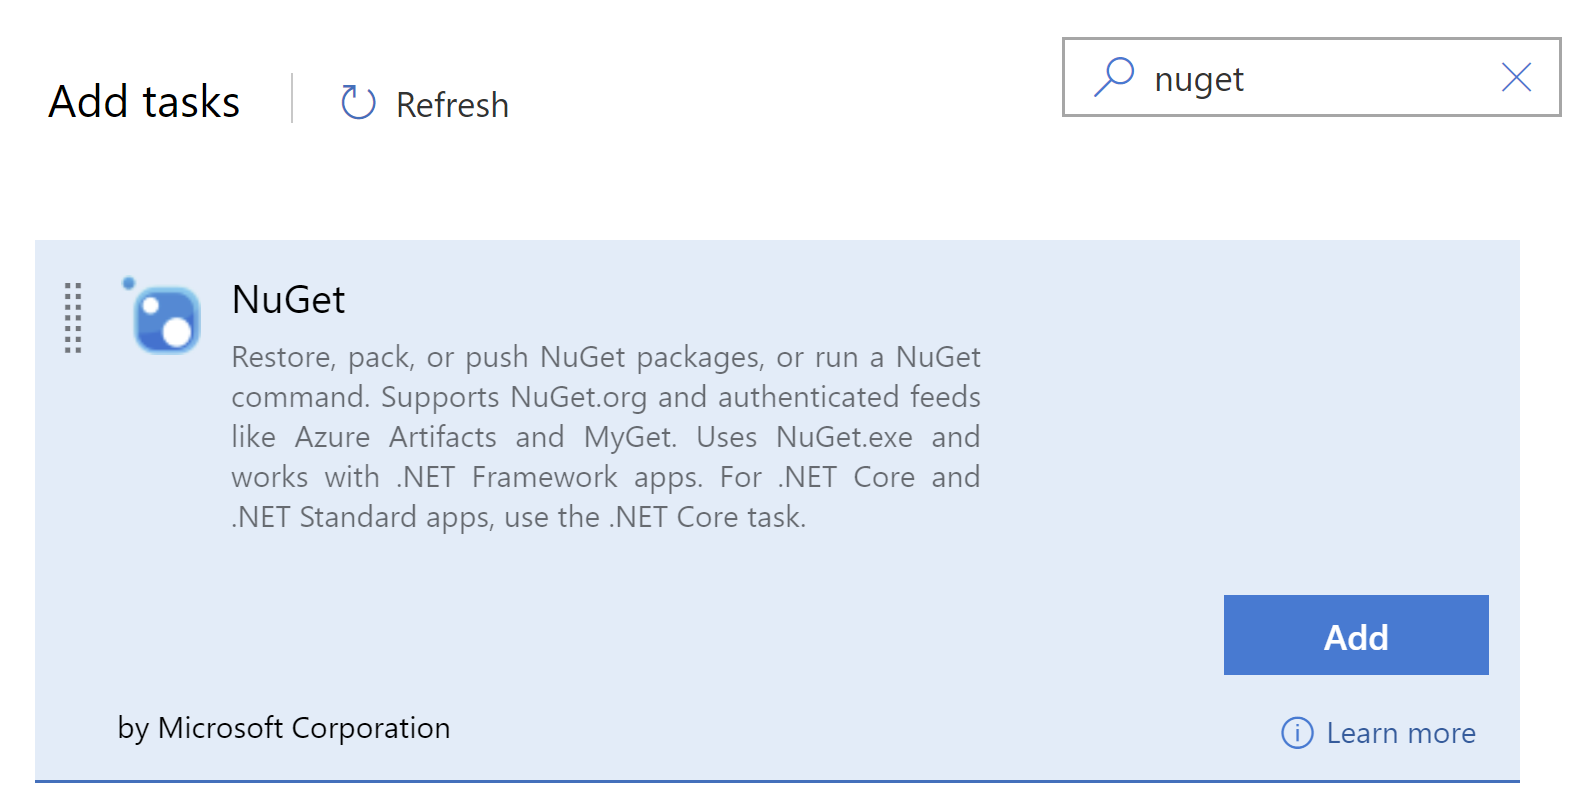
The tricky thing is here. The default value of Path to NuGet package(s) to publish is $(Build.ArtifactStagingDirectory)/**/*.nupkg;!$(Build.ArtifactStagingDirectory)/**/*.symbols.nupkg. But the release pipelines download pipeline artifacts to System.ArtifactsDirectory so we need to use $(System.ArtifactsDirectory)/**/*.nupkg. You can find the note here: NuGet task. For more details about Artifacts, please check the documentation here: Release artifacts and artifact sources.
The next important thing is that we need to create a connection to the NuGet server. If you are publishing the NuGet package to your organization, select This organization/collection for Target feed location. I am publishing it to NetGet, so I choose External NuGet server (including other organizations/collections).
If you have not created the connection to the NuGet server, click +New to create one. You can find the ApiKey in your NuGet portal. The Feed URL should be https://api.nuget.org/v3/index.json.
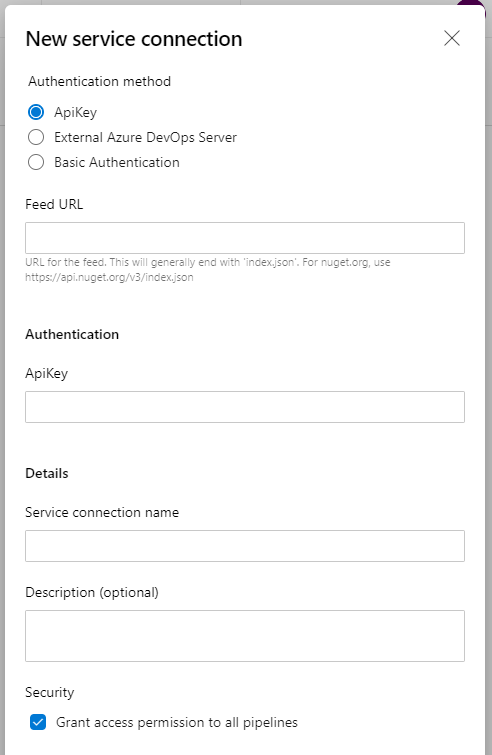
Click Save on the right top corner to save the configuration. The final configuration for the task looks like this:
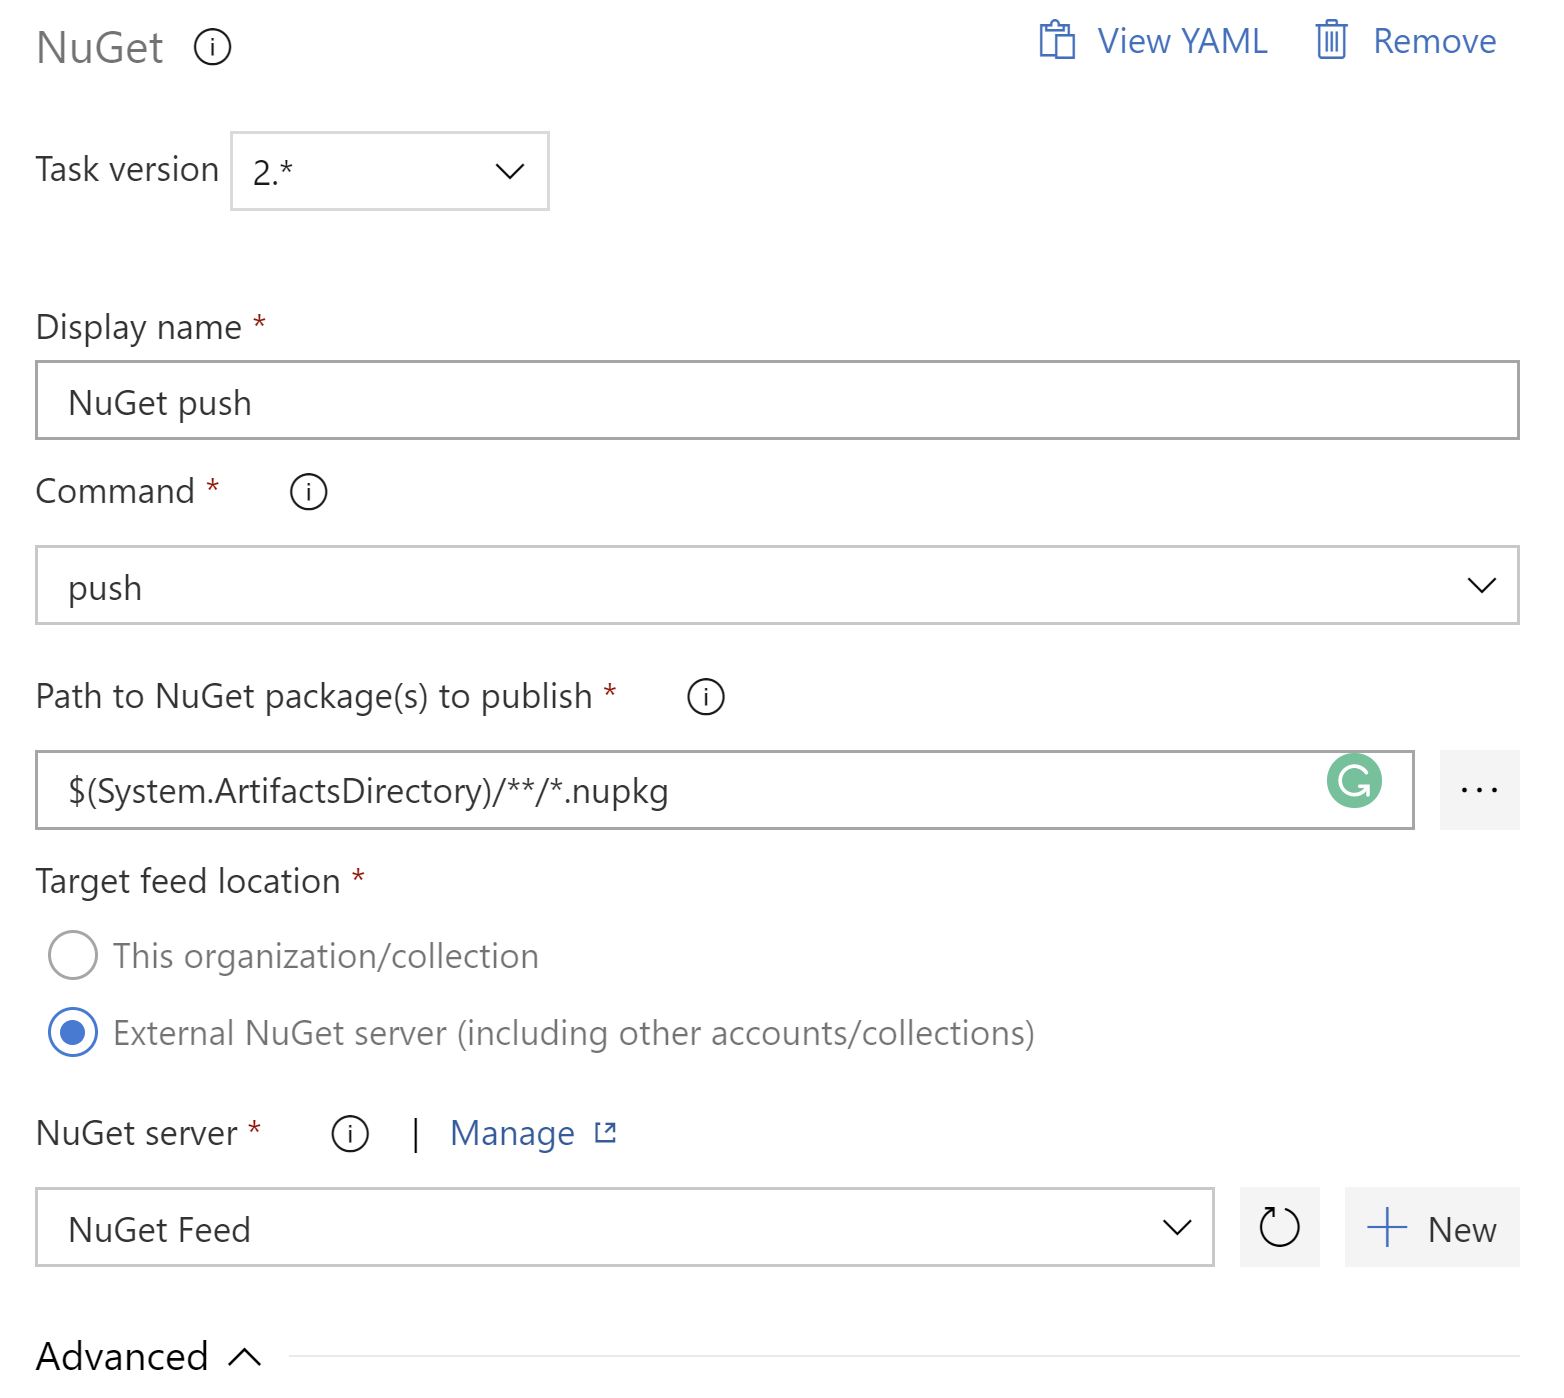
The job is quite straightforward because we only need to use one command. If you have more tasks, just add them. You can also create different stages for different environments, such as Dev, Stage or Prod.
Creating the release
Click Create release, you will see the page to configure the release:
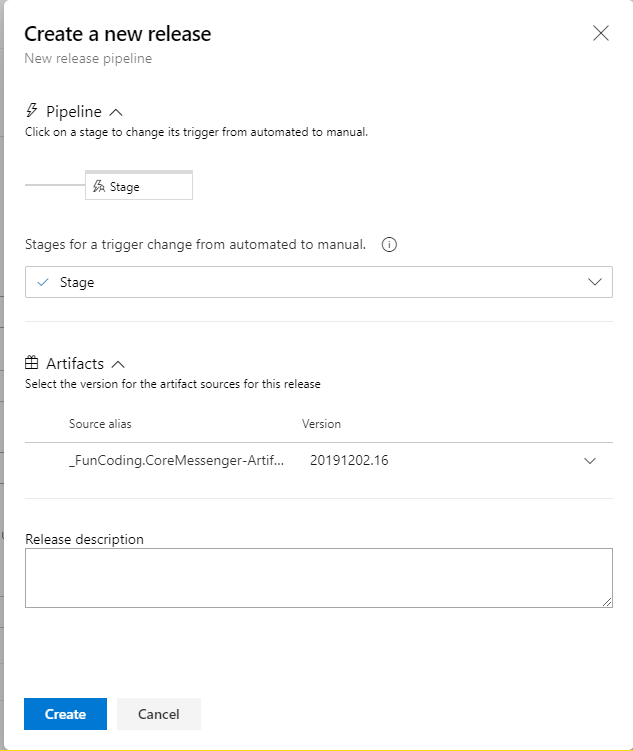
Click Create to start the release. Then return to the detail page of the release, click Deploy:
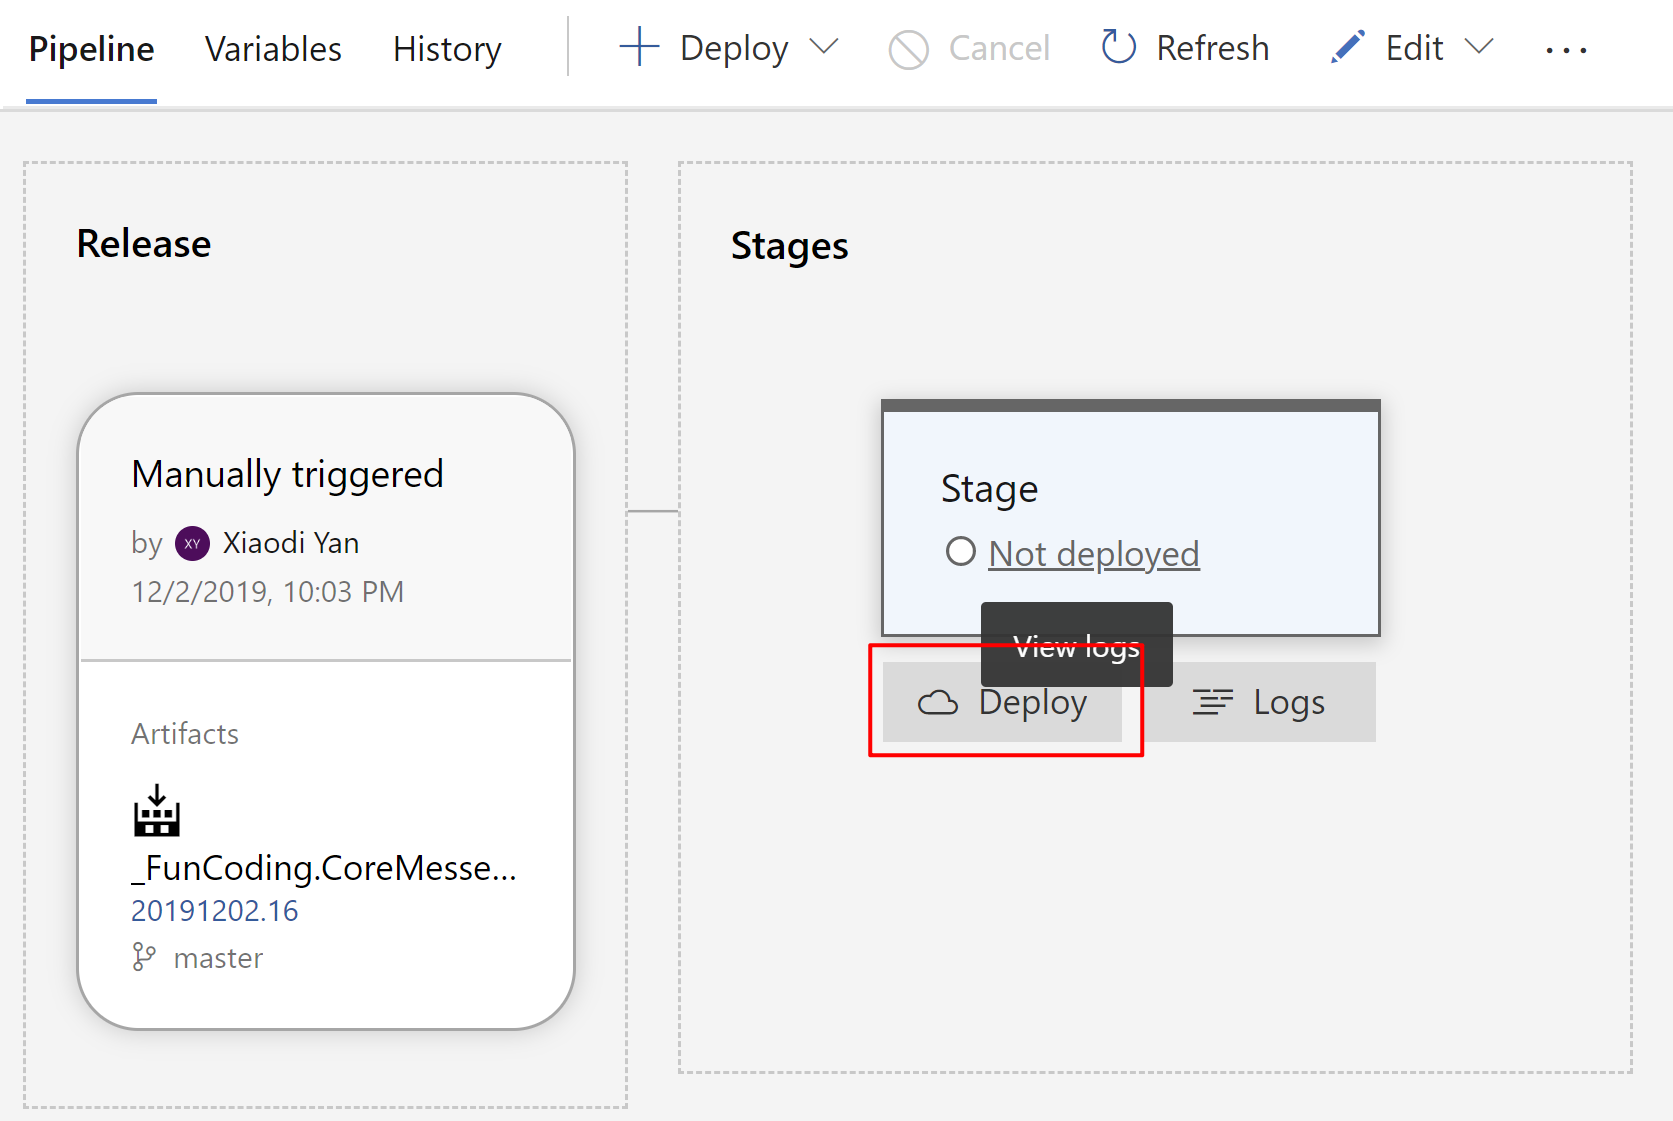
You will see a new page to deploy it:
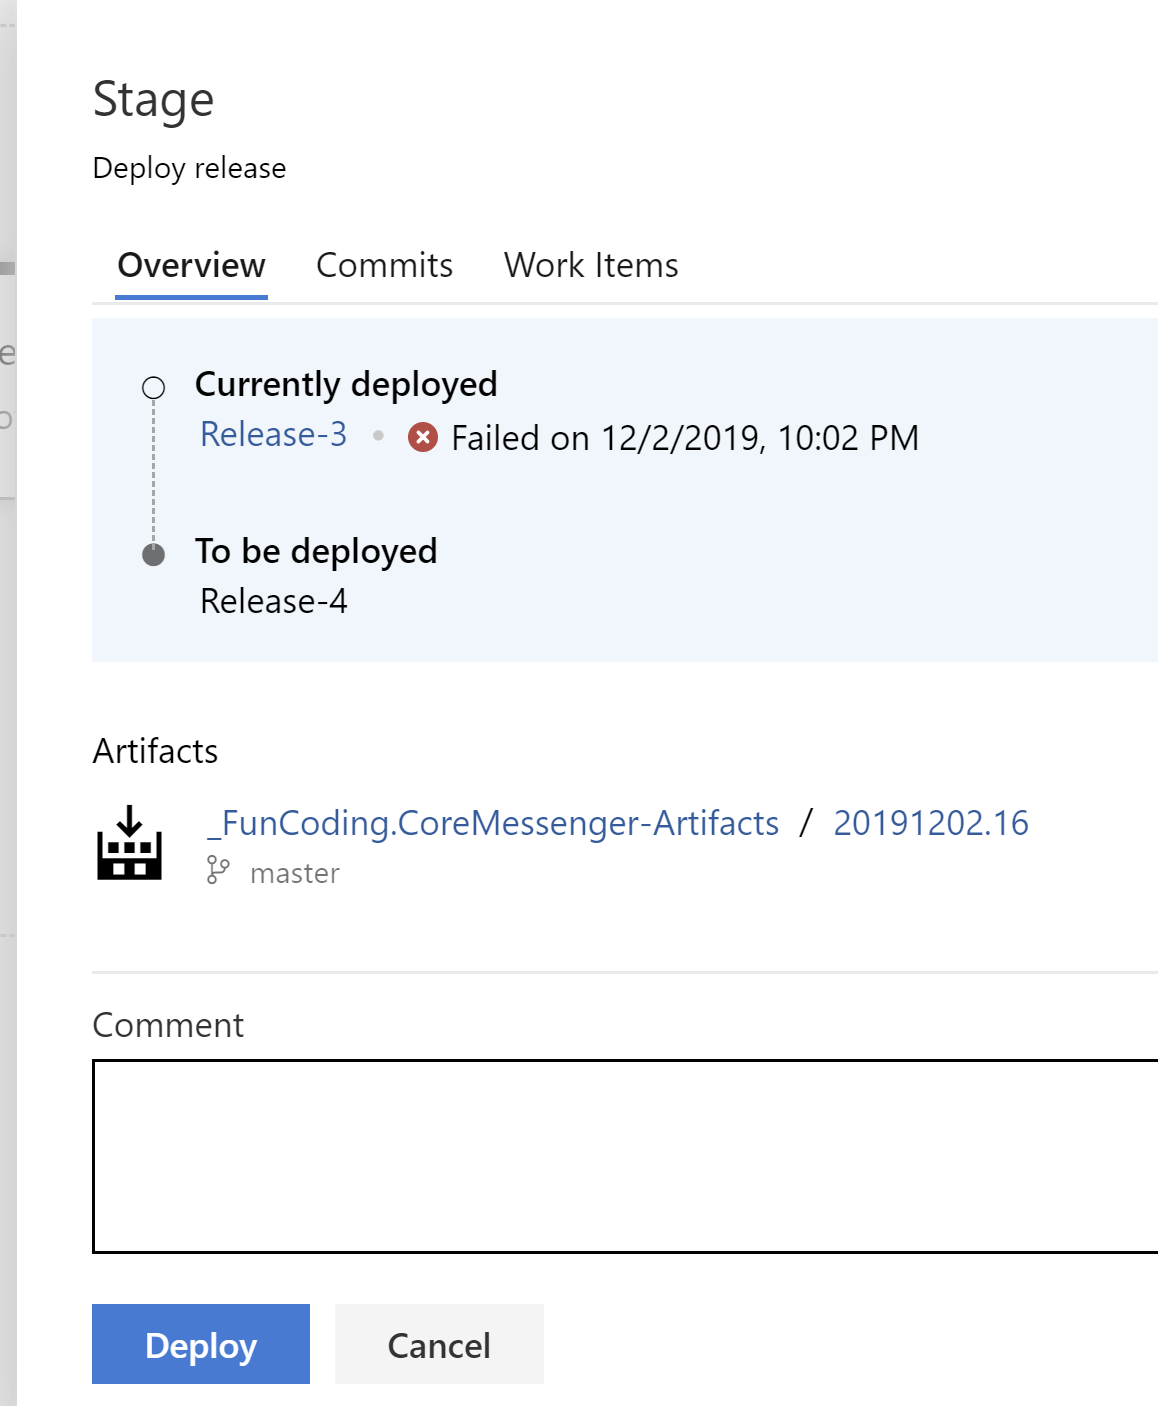
Click Deploy, the release pipeline will start.
If the release pipeline works, you can see the result as shown below:

Check the package on NuGet
Now sign in NuGet and I can see the package is right here:

Keep in mind that the package with an automated suffix like 1.0.0-CI-10191202-034430 is a pre-release version. Because we selected byPrereleaseNumber in the pack task. If we want to publish a formal version, we need to specify the version number by other ways. Versioning is another tricky thing in CI/CD. But I want to stop here because this article is to show how to write a YAML file from scratch. We did not cover the full details of git flow, such as branch-policies. I hope you could gain a basic understanding ofYAML and will not be scared of it anymore.
Conclusion
The final build script is shown as below:
1 | trigger: |
In this article, I introduced what YAML is and how to define a YAML file from scratch. Azure DevOps Pipelines provides us with a good editor with intellisense to write YAML files. You can also update the properties with the configuration panel. We did not cover all the details regarding CI/CD. Please check GitFlow and create corresponding branches. I hope this article would be useful to help you write your first YAML file. For more detail about Azure Pipelines, please check Azure Pipelines documentations. Thanks.